
How to create a complete Journey from Dashboard?
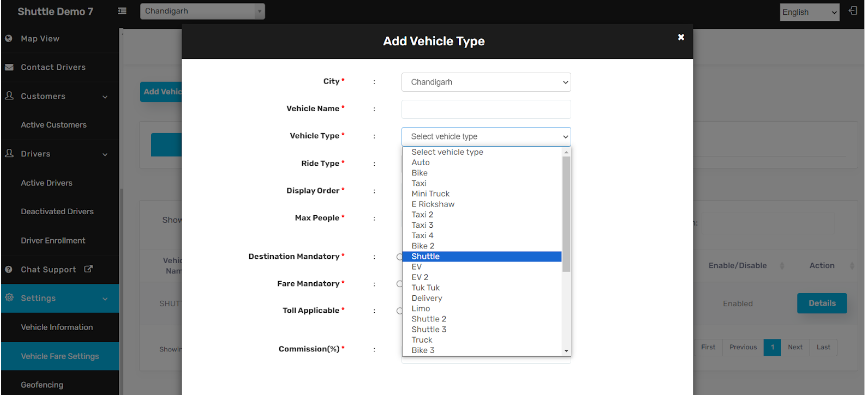
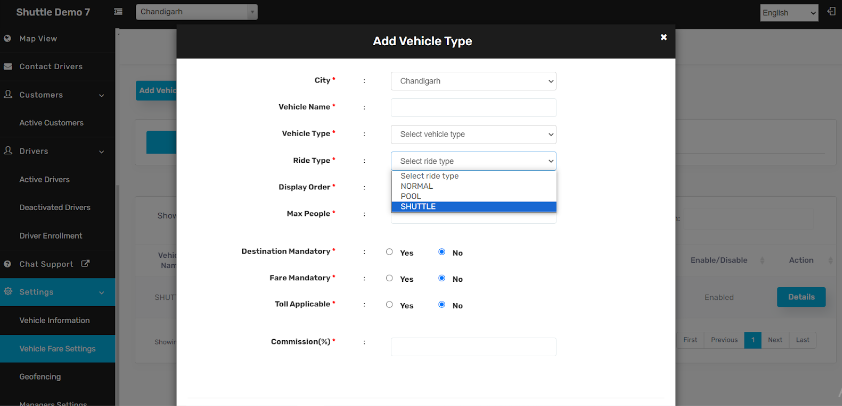
STEP 1. Create Vehicle Type from Vehicle fare settings in the side menu. Make sure to select the vehicle type as Shuttle.(If already selected , you can skip this step).

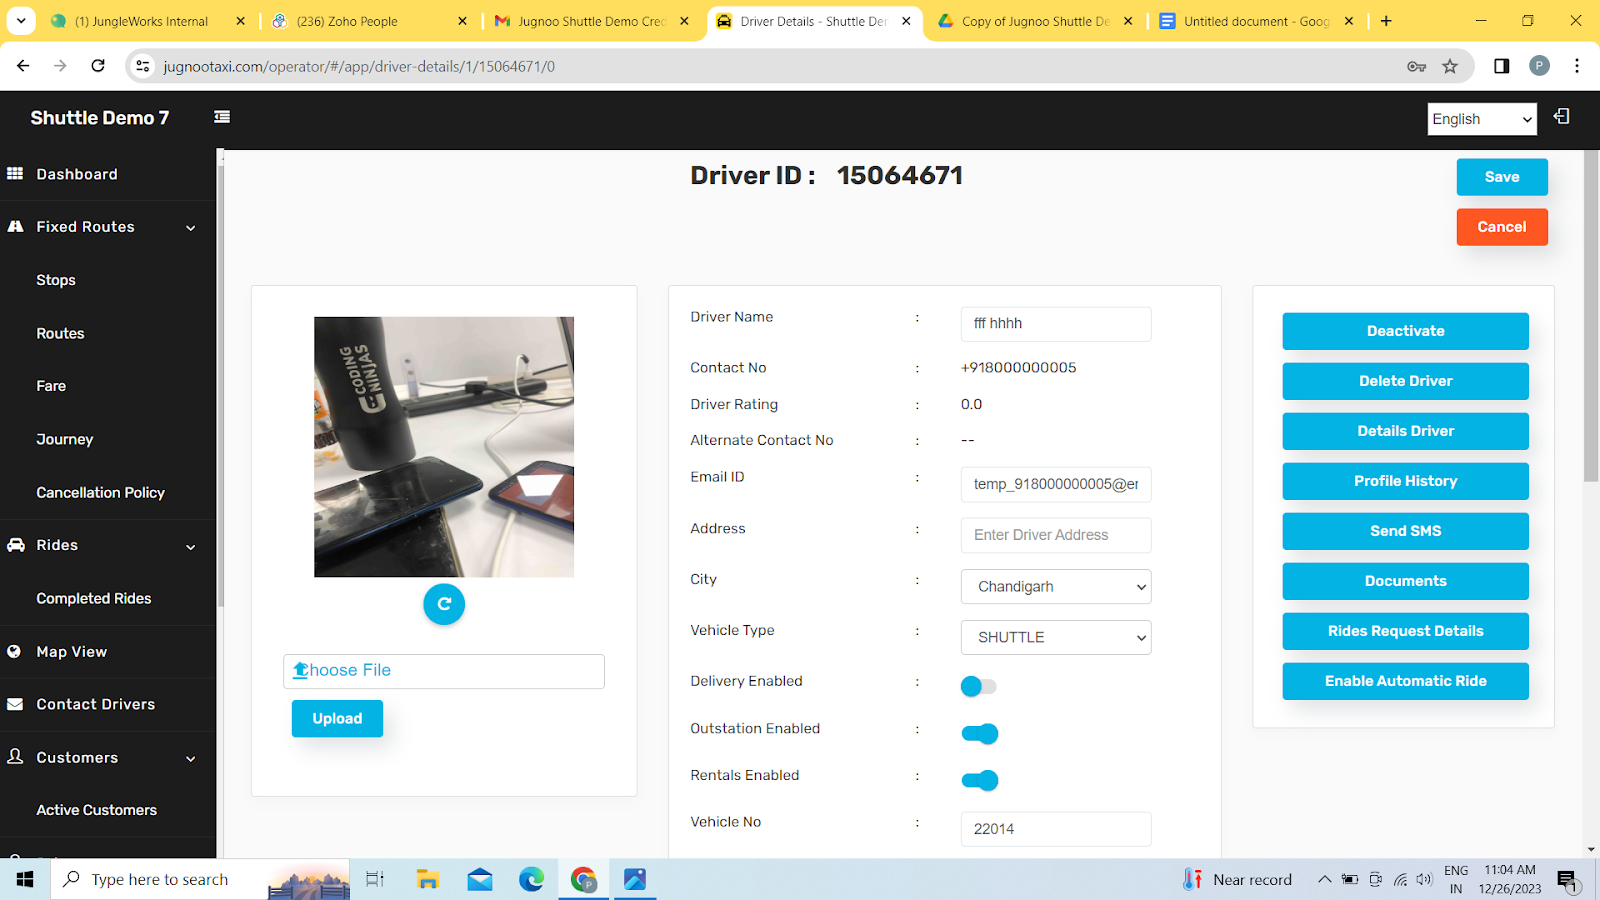
STEP 2. Make sure the demo driver has the vehicle type Shuttle against his profile.You can change the vehicle type from Taxi to Shuttle from the Active Driver tab.Edit his profile and change the vehicle type to Shuttle(the vehicle type you have created)
STEP 3. Now, the next step would be to add stops and fares accordingly.
a. Enter the stop’s name.
b. Enter the stop’s address
c. Add the request radius, this is the distance up to which the stop would be
considered.
d. Use the map interface in the right to define the stop.
e. Add stop.


STEP 4. Adding Fares.
a. From the side menu of the admin dashboard, click on Fares.
b. Click on the Add fare button.
c. A dialogue box opens up, choose the Fare Type (depends on if you are defining it for customer or Driver) , Fare Per Stop (For now, we are offering a payment logic where a route X will have a fixed fare per stop defined by the Admin from the panel, let’s say ‘Y/ stop, so the fare would total up to no. of stops traveled by user *Y’).
d. Threshold luggage count would be the no. of bags per user admin would want to allow for free, anything above that would be chargeable and the charges will be
defined in the fare per luggage after the threshold.
e. Add fare.

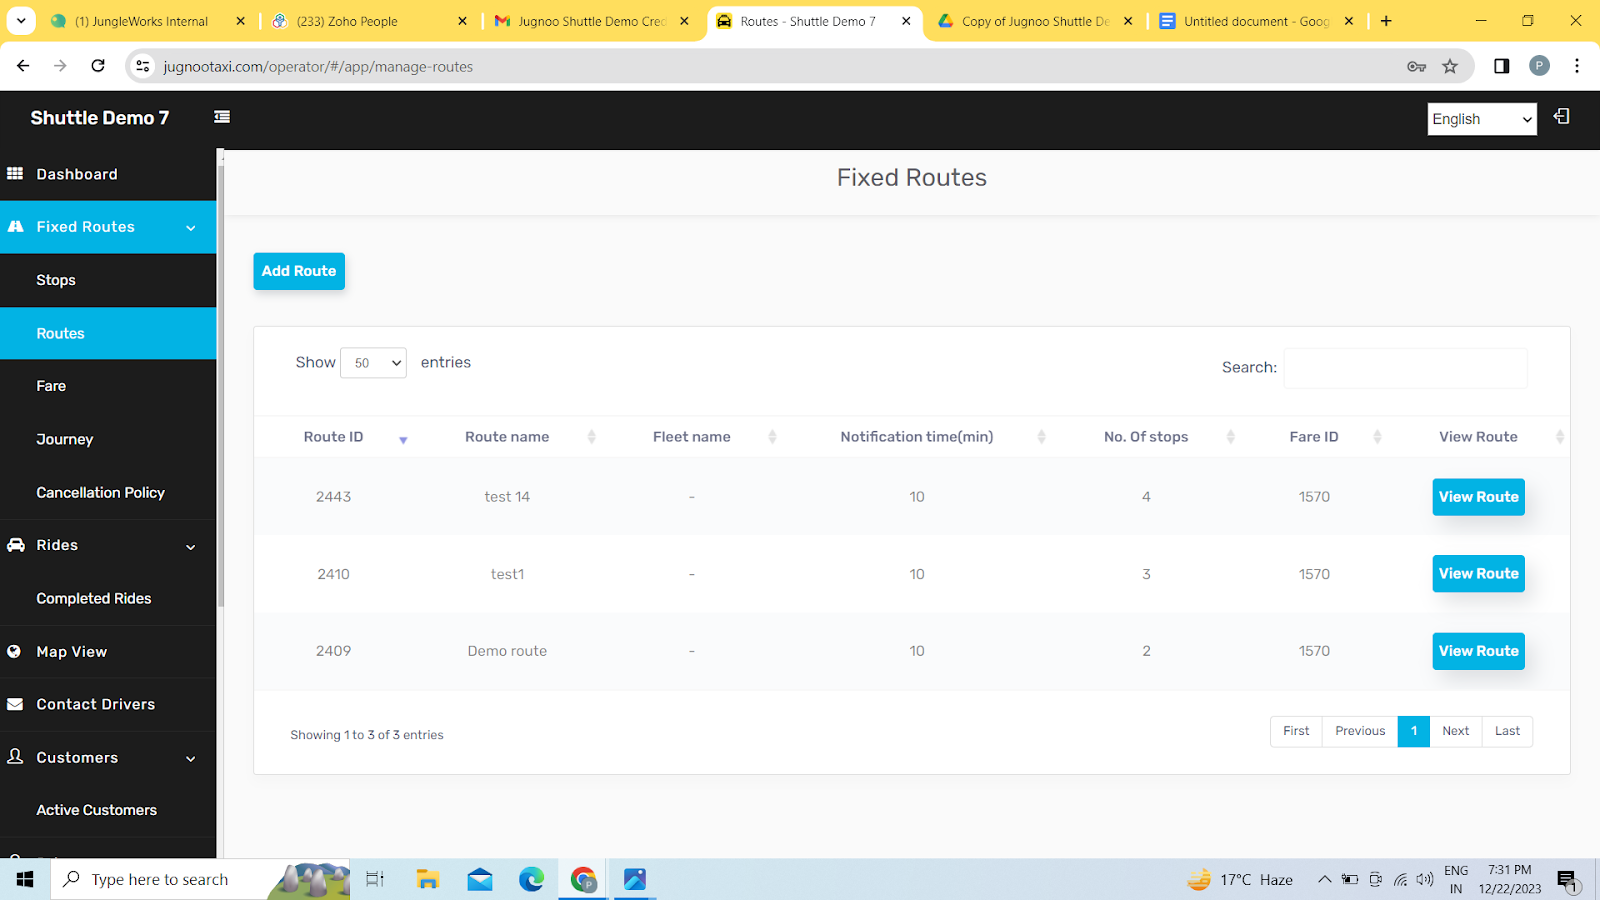
STEP 5. Create a route.
a. From the side menu, go to the Routes tab.
b. Click on Add route button.
c. The next screen will allow the admin to name the route, add the stops for this
route(by clicking on the stop from map),enter stop radius and stop wait time, stop also define the approximate amount of time it will take for the designated driver to reach from stop 1 to stop 2 and so forth and select the fare ID he/she wants to associate with this particular route.
d. This screen will also have a map interface on the right with red pins denoting the
pre-defined stops, which can now be added to the route.
e. Once all the above are added, Create route allows the Admin to view the route
with the stops as follows:

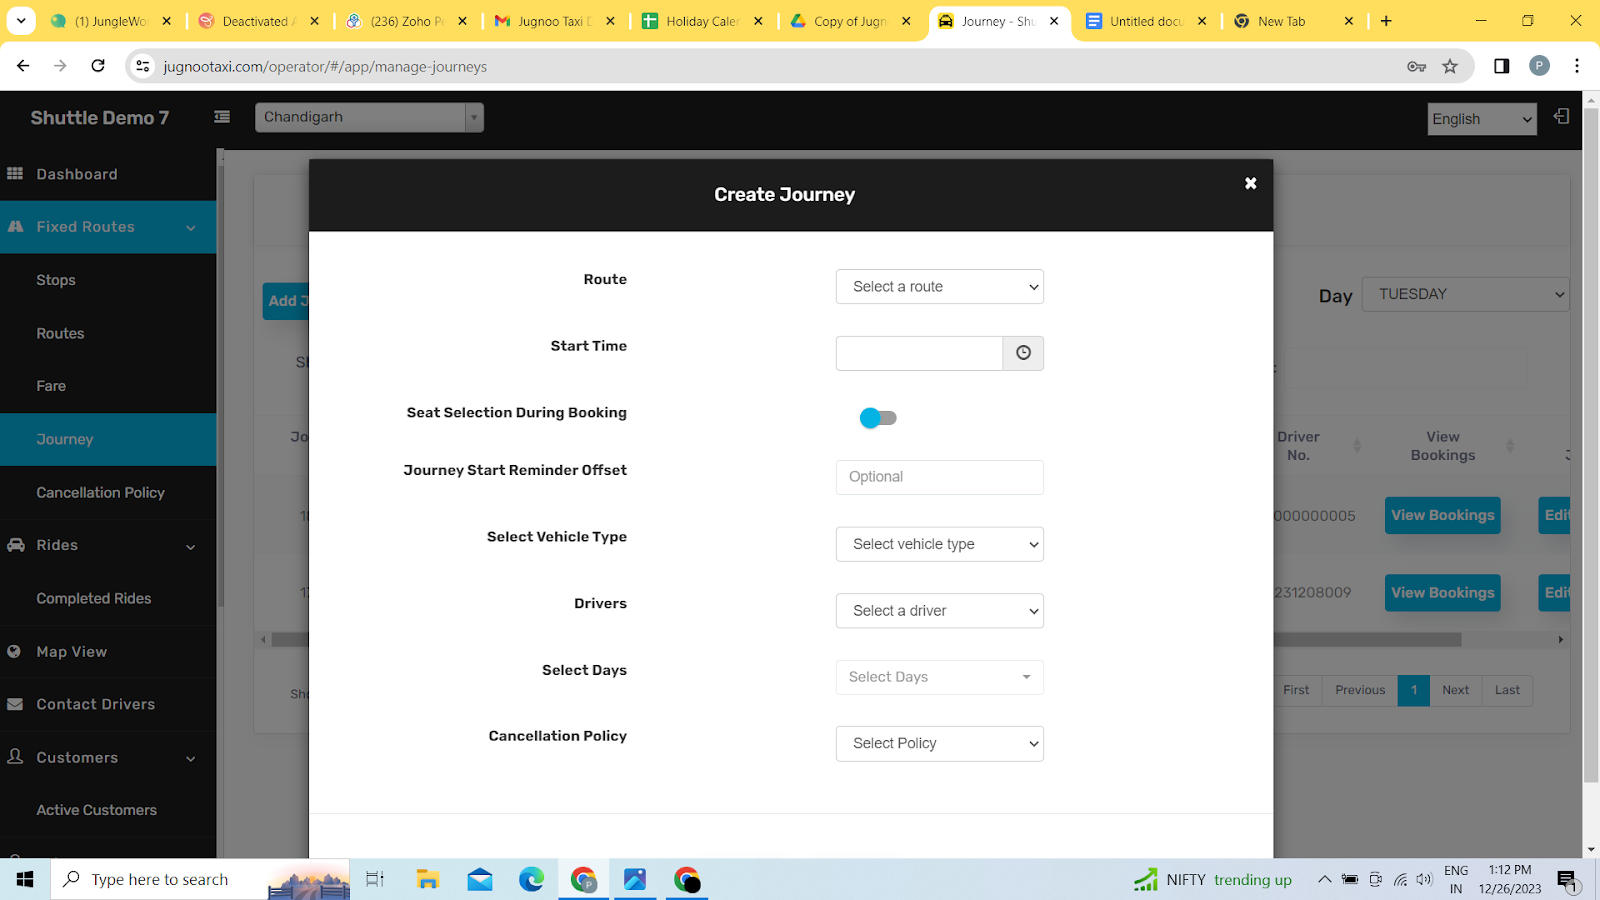
STEP 6. Creating a Journey.
a. From the side menu, choose the tab Journey.
b. Click on the Add Journey button.
c. The dialogue box allows the admin to define all the necessary elements to create Journey.
d. Select the route from the drop-down of all the created routes.
e. Define the start time for this journey.
f. Change toggle to right if you want to select seats according to your choice else seats will be auto selected
g.Enter the journey reminder time which the driver will receive on the driver app before the start of journey as reminder(Optional)
f. Select the vehicle type (Shuttle)
g. Assign the driver for this journey.
h. Select the days from the 7 days of the week for this journey to happen.
i.Enter cancellation policy (Optional)
CUSTOMER APP
i)After successful login to the customer app, enter pickup and drop location. App will show various options present on that particular date.
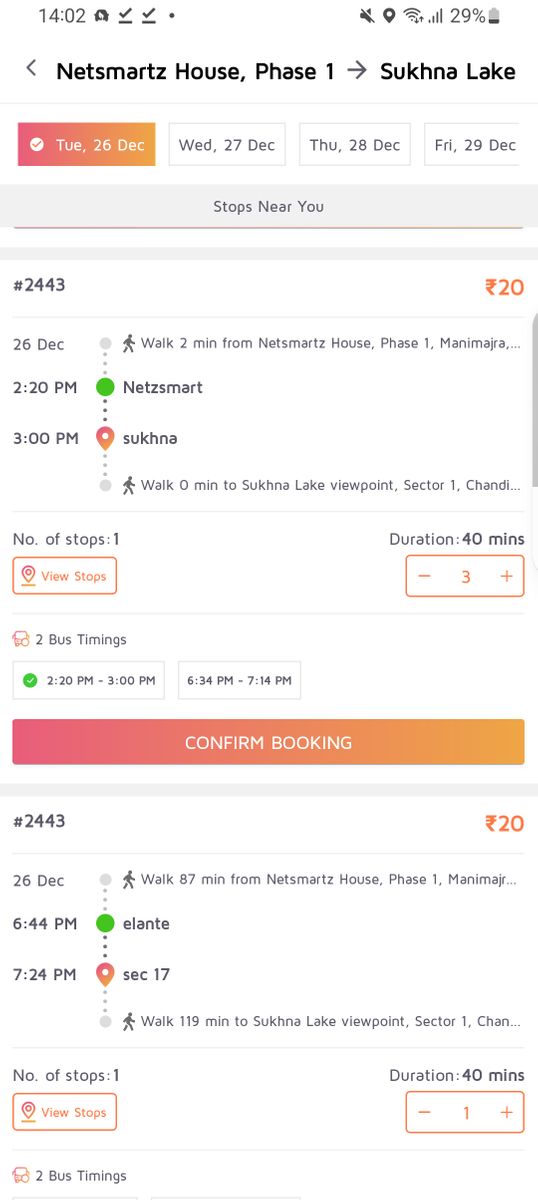
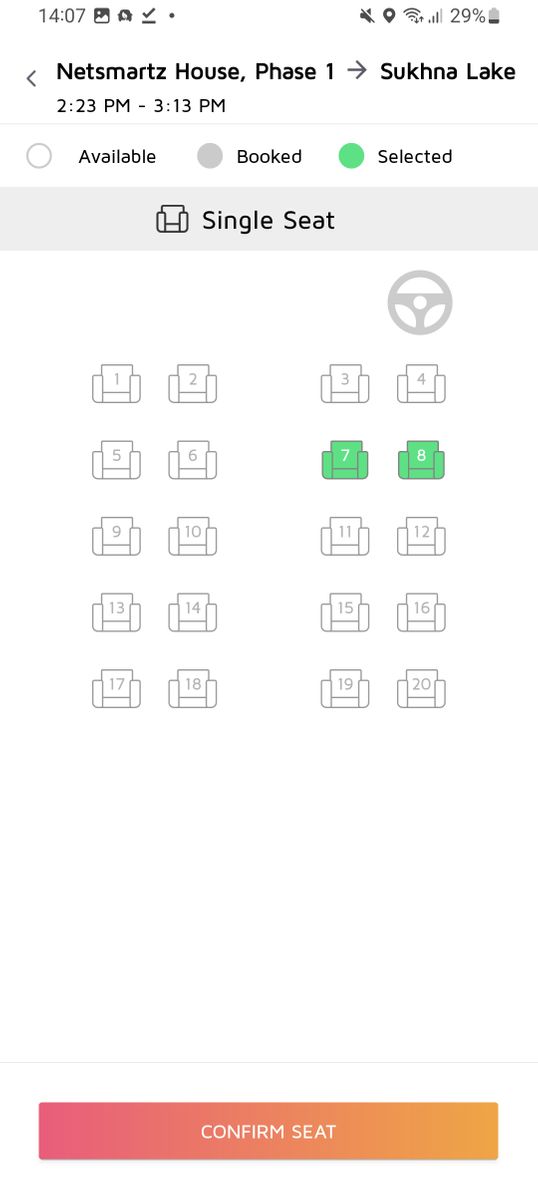
ii)After selecting the suitable time of shuttle and number of seats (in case seat selection toggle is off) , click ‘CONFIRM BOOKING’.If you have turned on the option of seat selection from the dashboard , then select the seat from the arrangement of seats and press ‘CONFIRM SEATS’.
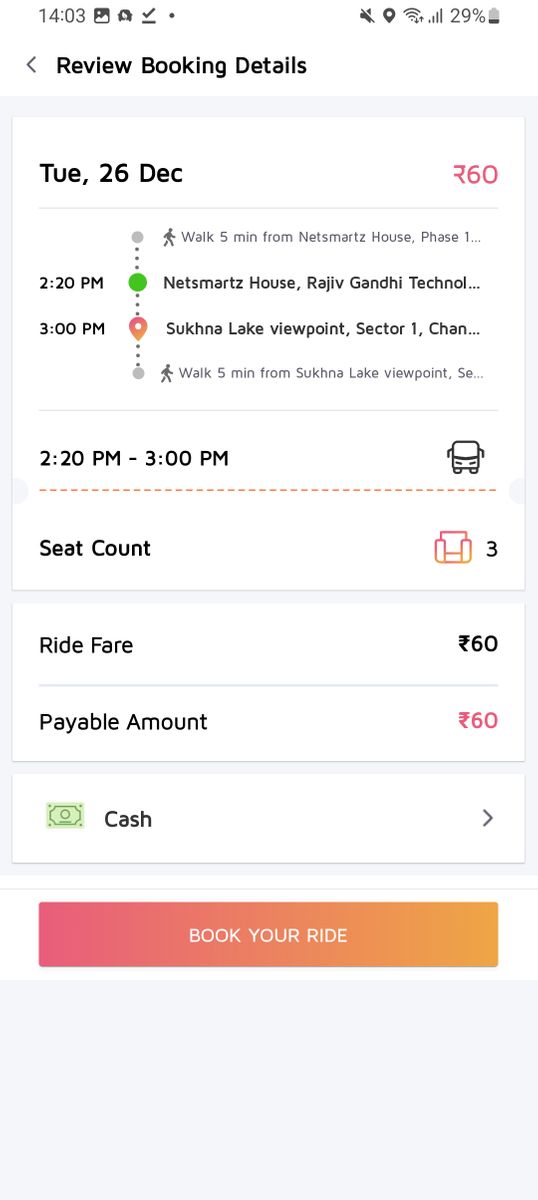
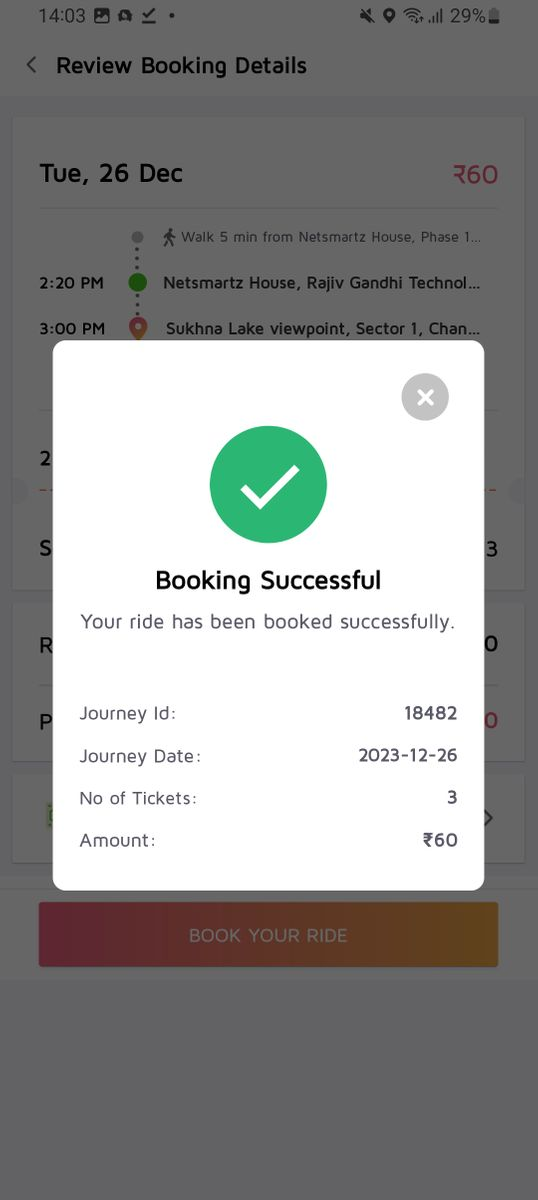
iii)After selecting seats , check the details of your journey and select the payment option. Click on ‘BOOK YOUR RIDE’ and a success message will appear.
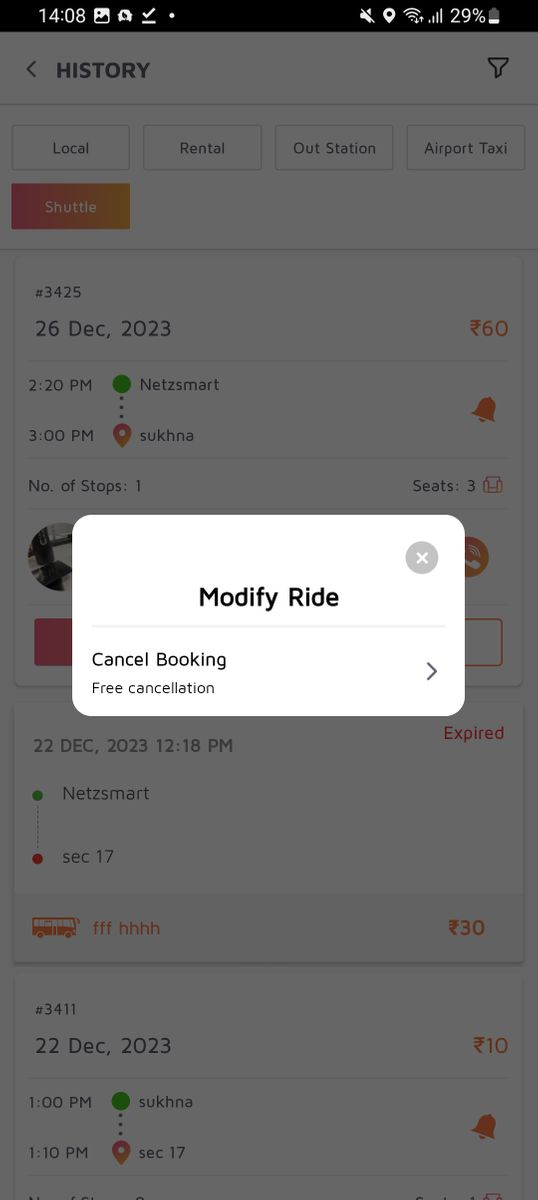
iv)You can check details of the booked ride in the history section where you can modify , view,track and cancel the ride .

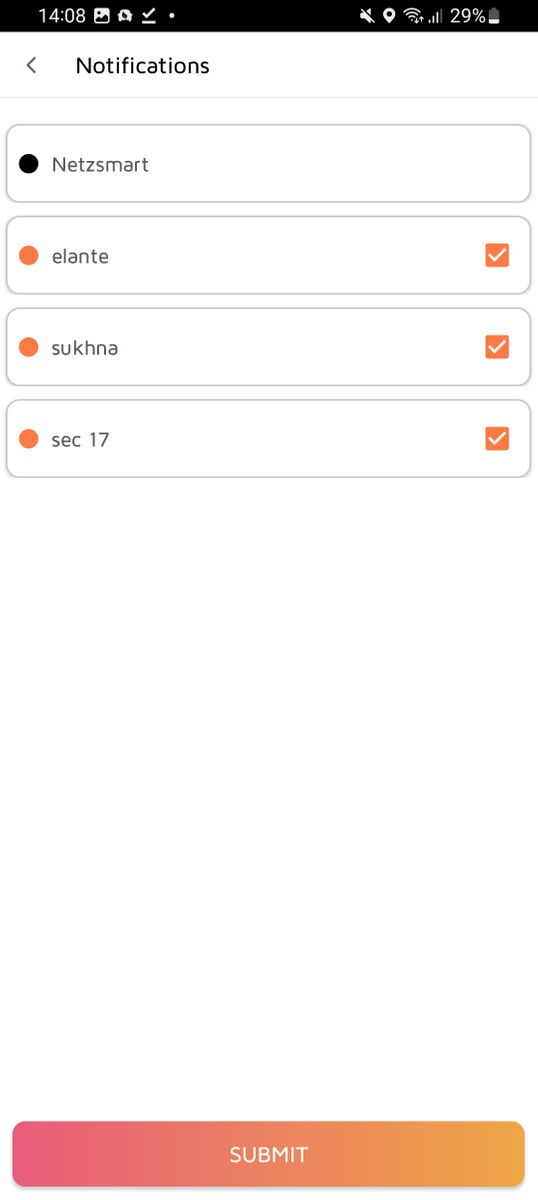
v)Bell icon is clickable and used for setting up notification of the arrival of a stop. You can click against the stop name to set a notification (alarm) for the particular stop.
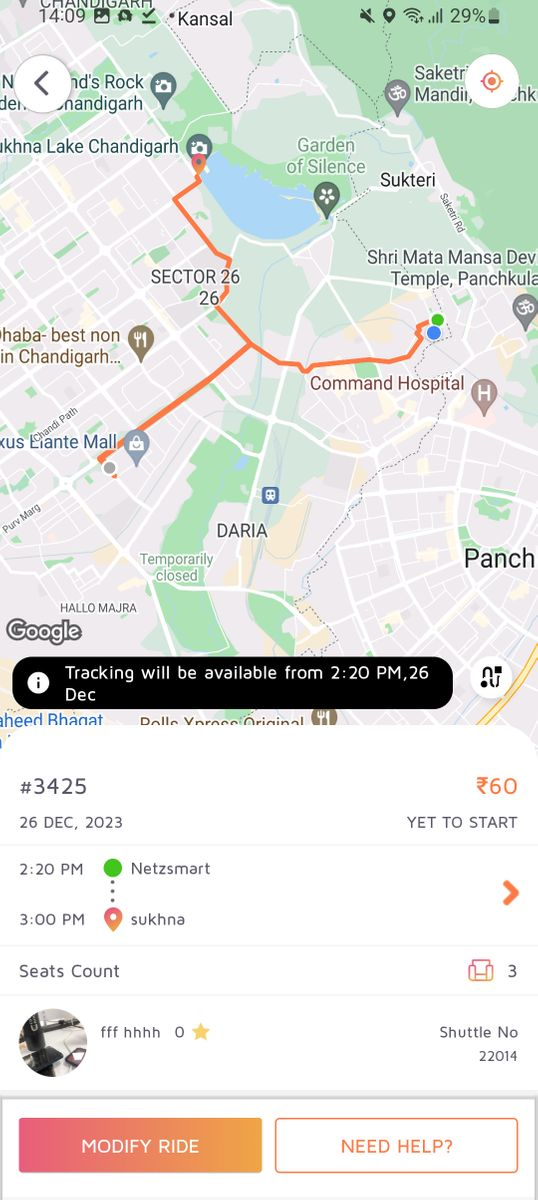
vi)On clicking the journey , you can track the journey and view stop details.

DRIVER APP
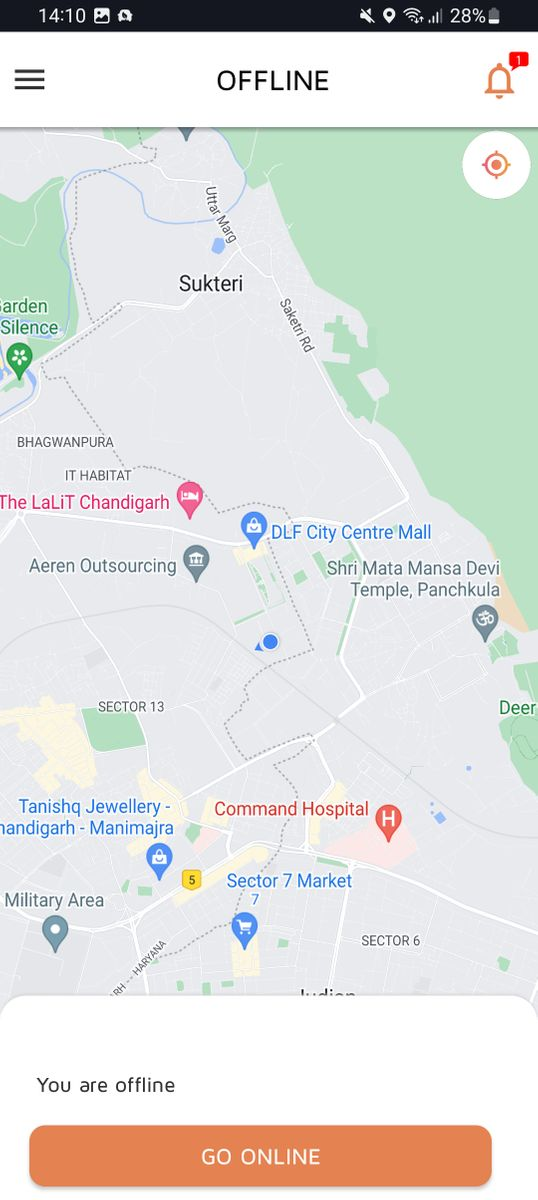
i) After logging in the driver app, the next screen is the home screen, where the driver can see his current location on the map interface, from the hamburger icon on the left he can access the side menu.
a. The driver can mark his status online/offline, helps admin to track him via the
dashboard.
b. He can access the routes assigned to him using the “Routes” tab.

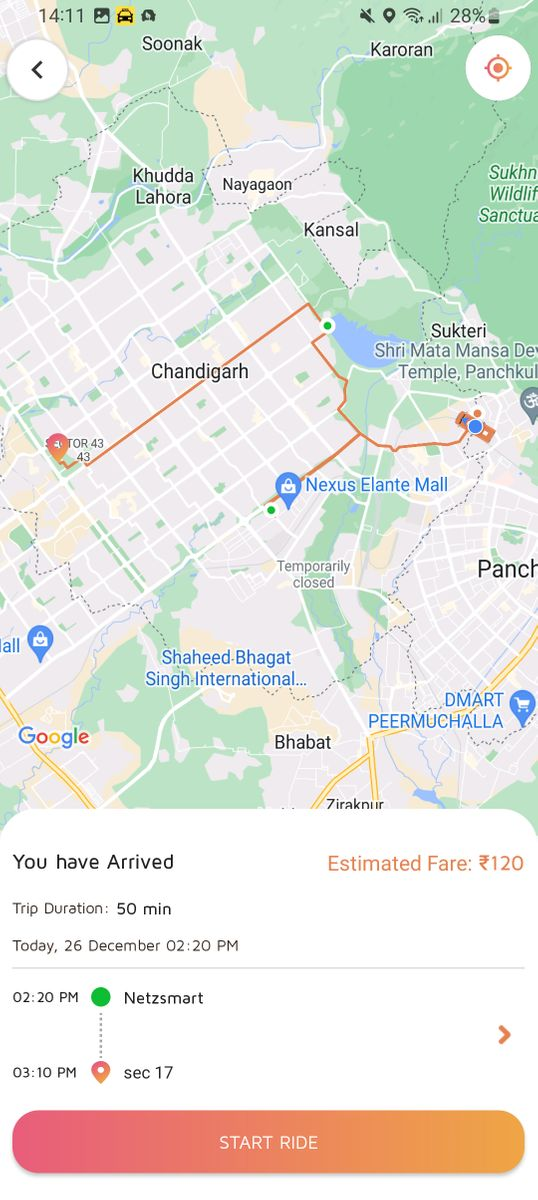
ii)Check the journey under routes and start the journey by clicking ‘START RIDE’.

iii)Driver can see number of onboard and offboard, by clicking the side arrow present in right of source and destination.

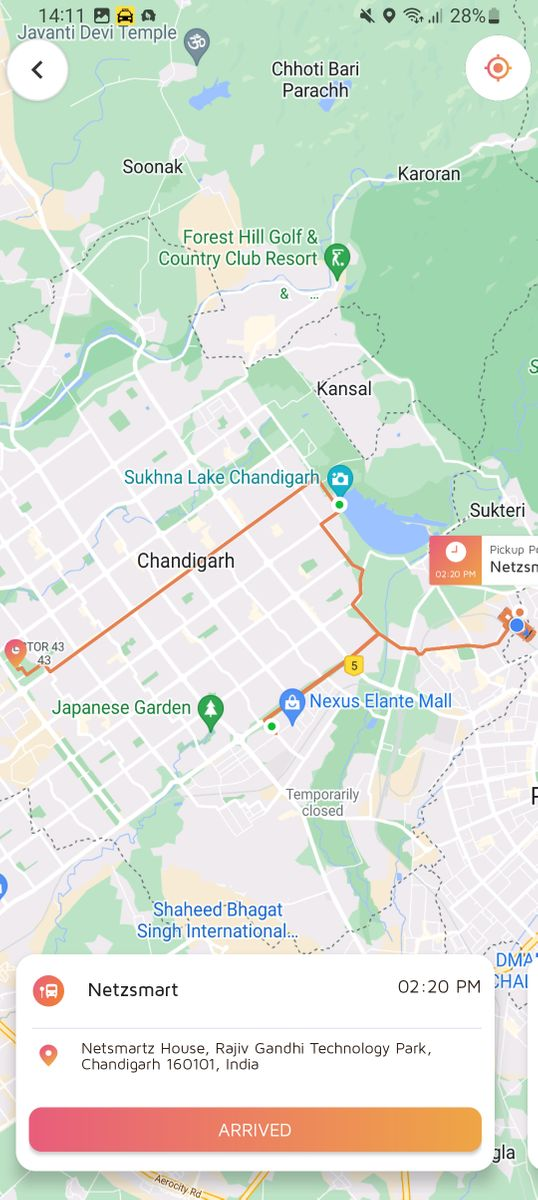
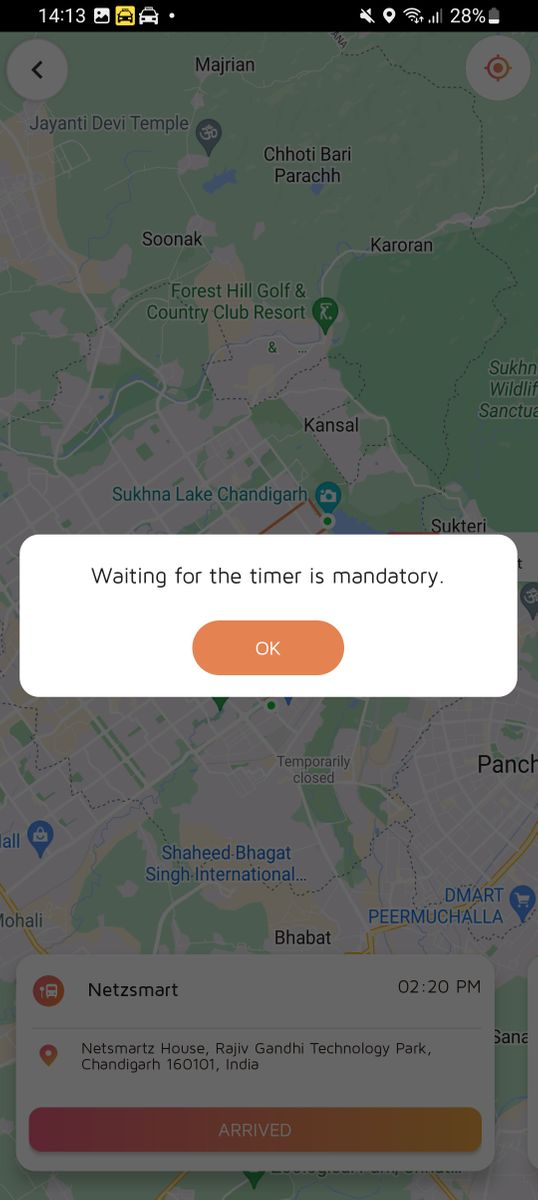
iv)After starting the ride , the driver has to mark the stop as arrived and onboard customers meanwhile waiting time will appear in back . It is mandatory for the driver to wait till the wait time gets over, then only he can depart the stop.
For departing the stop , two conditions have to be fulfilled-
a)Onboarding and Offboarding is done.
b)Wait time is over
Then only he can depart the stop.
NOTE- Driver also has option to cancel the ride of customer in case he is not present or any other reason.
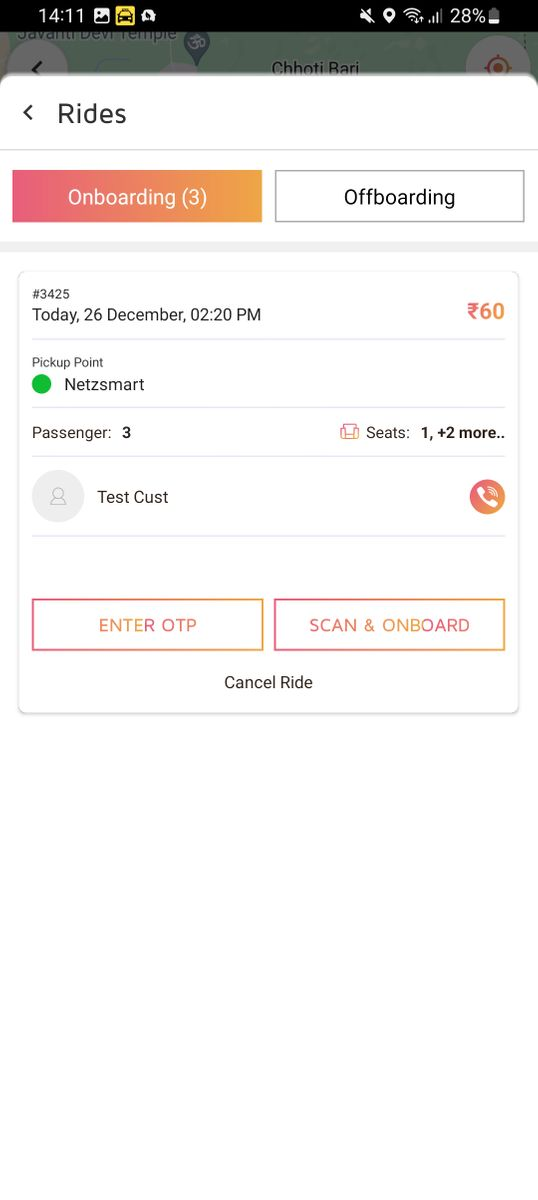
v)For onboarding customer , driver has two option to onboard-
a)By entering OTP which appears on the customer app.
b)By scanning the QR code.

vi)When there is no pickup or drop stop can be marked departed but waiting for wait time is mandatory if the wait time is mentioned from the panel for the stop.

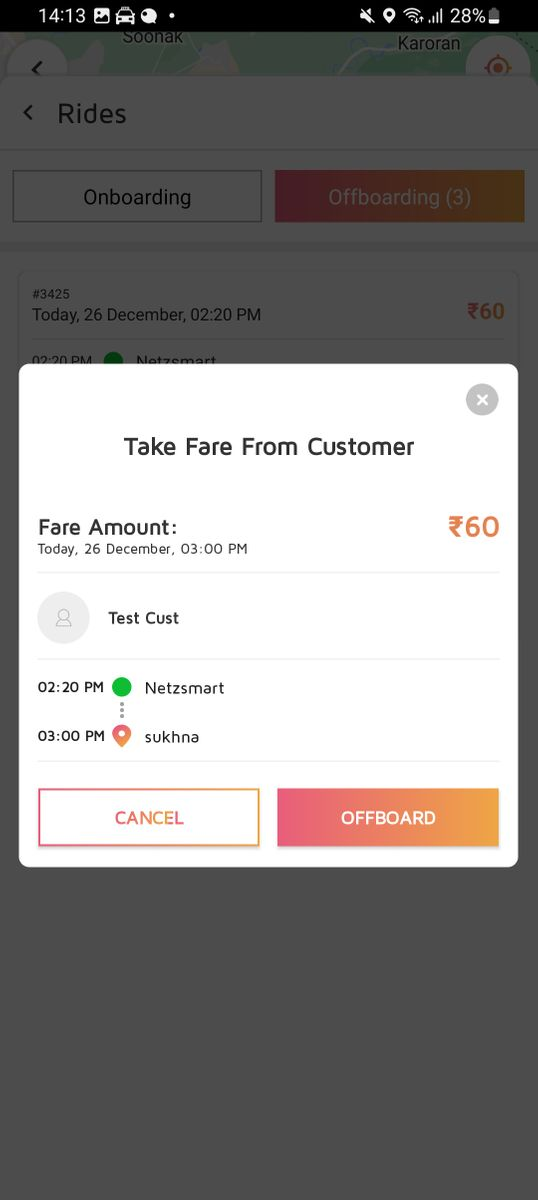
vii)For offboarding the customer , click ‘OFFBOARD’ and cash to be taken if payment method is cash.Rating is also to be done after the successful offboard.


viii)As the last stop arrives the journey can be ended.

Leave A Comment?