
1. Introduction
Corporate allows different companies to collaborate with your taxi business by offering paid transportation services for their employees and fleets. This helps avoid manual fare adjustments within the company. For example, you can offer rides to employees traveling to the airport or provide transportation for business clients, making organizational travel simpler and more efficient
2. How to Add Corporate on the Super Admin Panel
A Super Admin can add various organizations and companies to associate with your Taxi Business.
Go to the Corporate tab in the side menu to view the list of all added corporates. To add a corporate, follow the steps below:
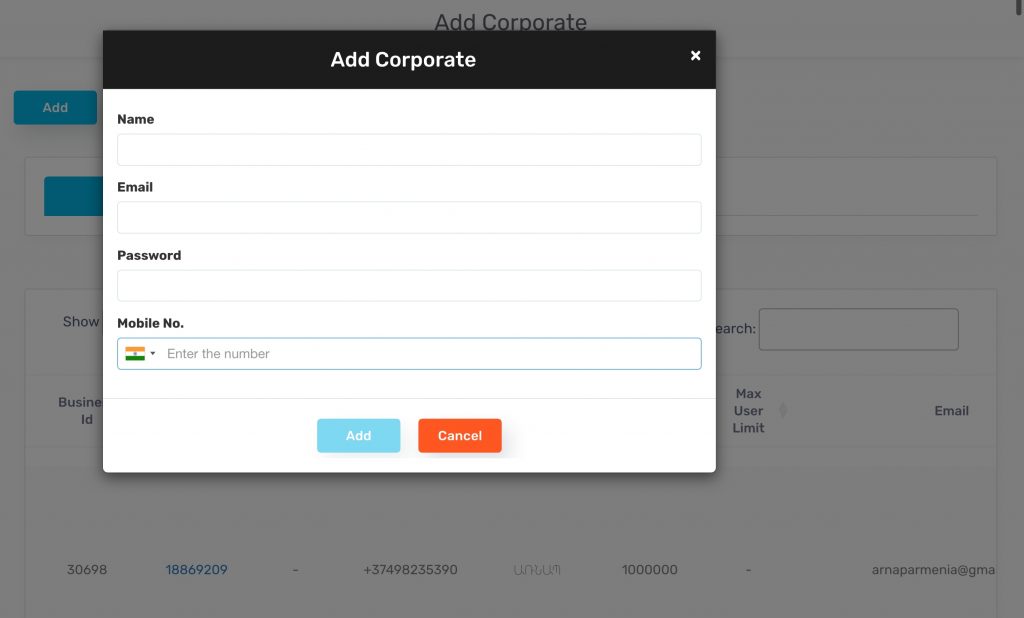
1. Click on Add Corporate.
2. In the pop-up, enter the name, email, password, and phone number. (Ref: Figure 2.0 – Add Corporate)
3. Once all details are entered, the Add button will be enabled. Click it to add the corporate.
Please Note: You can only Block or Unblock a corporate. Therefore, ensure that all details are entered correctly.Once the corporates are successfully added, they will receive a verification email. After verification, they can log in using the provided URL to access the Corporate Dashboard.
You might encounter an error while creating a Corporate account that says “Something went wrong.”
This usually occurs when the number, name, or email ID has already been used on the platform. To resolve this, simply try changing these fields — once updated, it should work fine.
Corporate Account Management
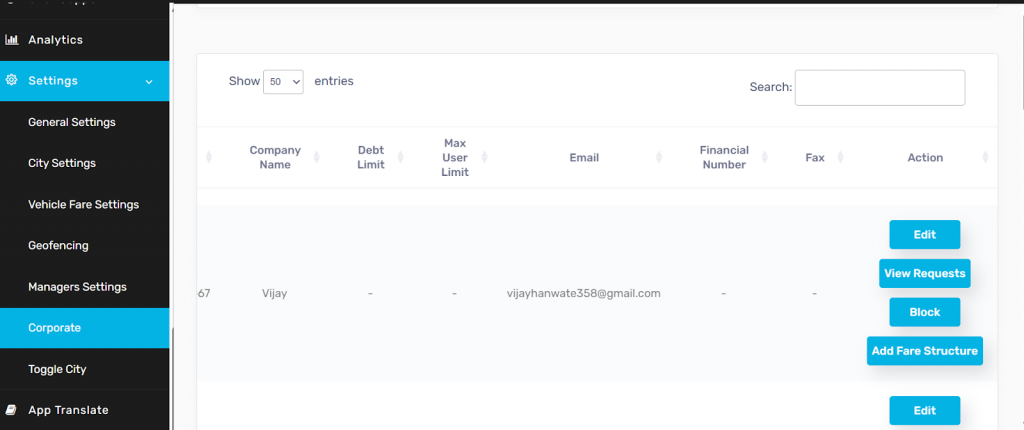
Once a corporate account is created, the following actions are available for the admin: Edit, View Request, Block, and Add Fare Structure.
1. Edit
The admin can edit various corporate account details such as:
- VAT number
- Company address
- Fax details
- Other relevant company information
This allows the admin to keep the corporate profile up to date.
2. View Request
From the corporate panel, corporate users can raise requests for:
- Debt limit increase
- User limit increase
All such requests are displayed under the “View Request” section.
Once the admin reviews and approves a request, the approved credit or limit is automatically updated in the corporate panel.
3. Block / Unblock
The admin can directly block or unblock a corporate account as needed.
Blocking an account restricts all associated users from accessing corporate services until it is unblocked.
4. Add Fare Structure
The Super Admin can create and manage customized fare structures for each corporate account.
Admins can:
- Select specific vehicle types
- Define unique fare structures per corporate client
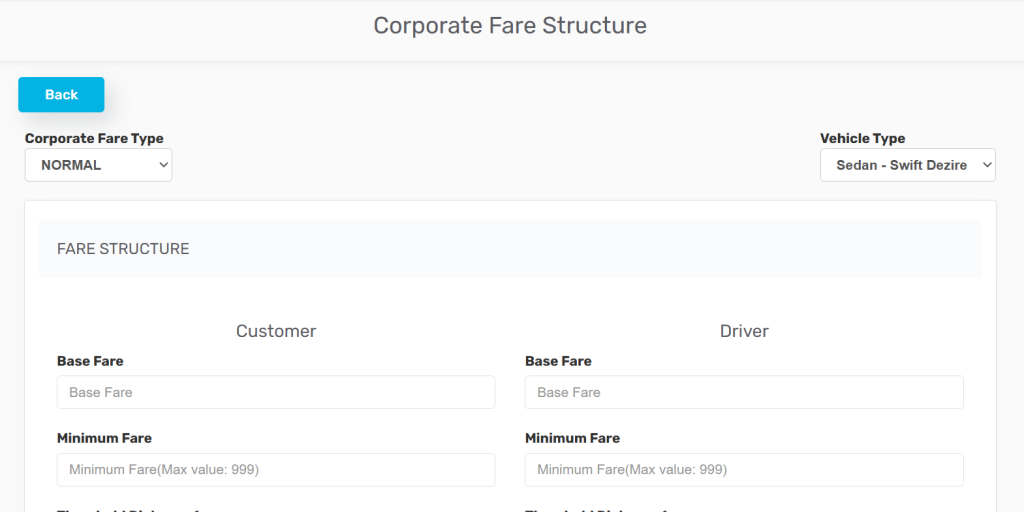
These fare structures will apply only to the users registered under the respective corporate account.
3. Corporate Business User State Business Users
Corporate Businesses can access the dashboard wherein they can add their Employees or Clients to offer transportation services as a new payment method to simplify organisational travels.
a. Profile
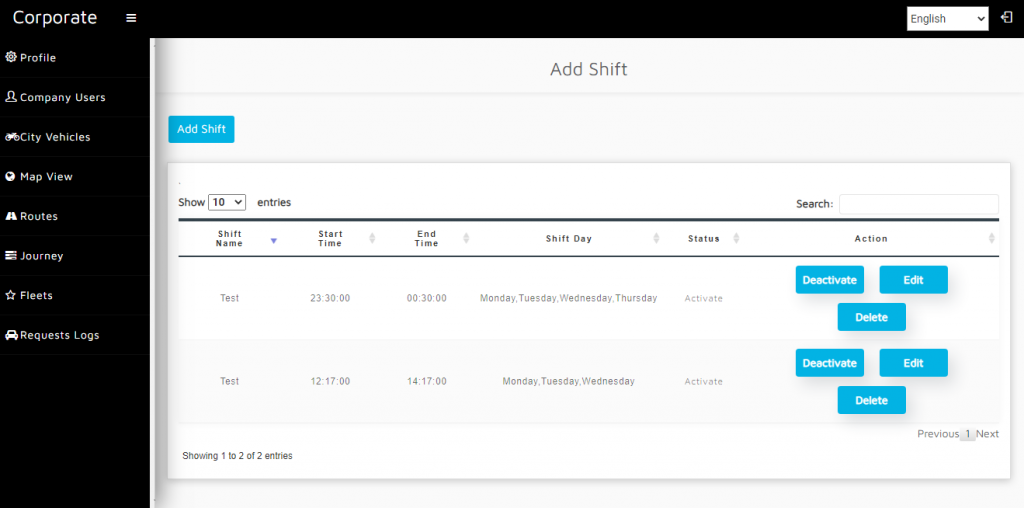
Profile section allows us to Specify the Shift timings for our users/ Employees directly from the corporate panel.
1. Go to Profile section
2. Click on add Shift
Shift Basically refers to a work schedule that is performed in rotations. Different groups of workers often do the same jobs in rotation. For example, while some employees might fill a role during the day, others might work night or early morning shifts. For the Company’s convenience, we have added this functionality to add the shift for the users.
Users/ Employees will only be able to get the ride that has been fixed by the Company on the Corporate panel
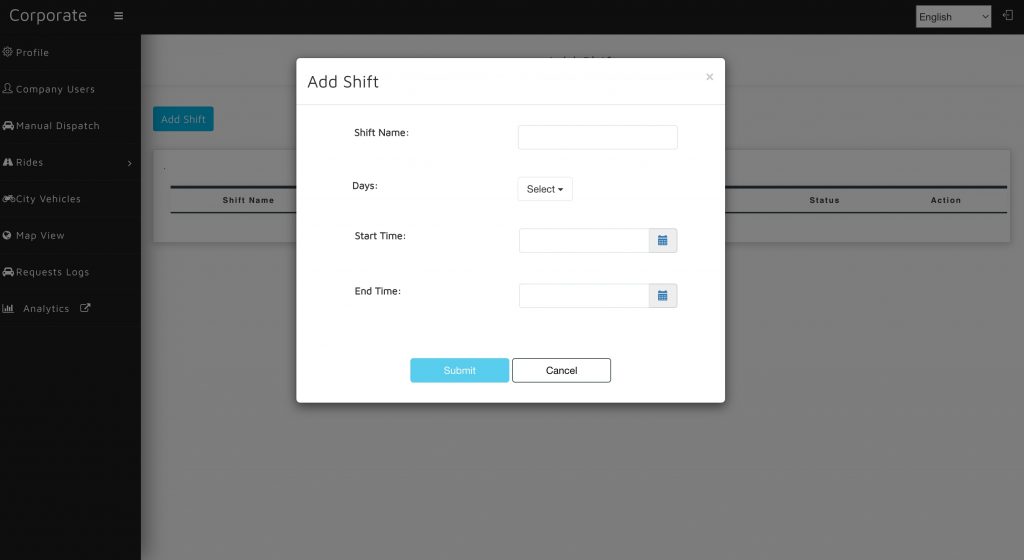
3. Click on Submit
b. Add a Corporate
In order to Add Users to a Corporate, follow the below mentioned steps:
1. Login to the Corporate Panel with the given credentials.
2. From the tabs, click on Company Users.
3. Click on the Add Users button. (Can also Choose the Shift timing for the Users)
4. Enter the phone number of the User and click on Submit.
Please note, an added User can be blocked or unblocked from the company users list.
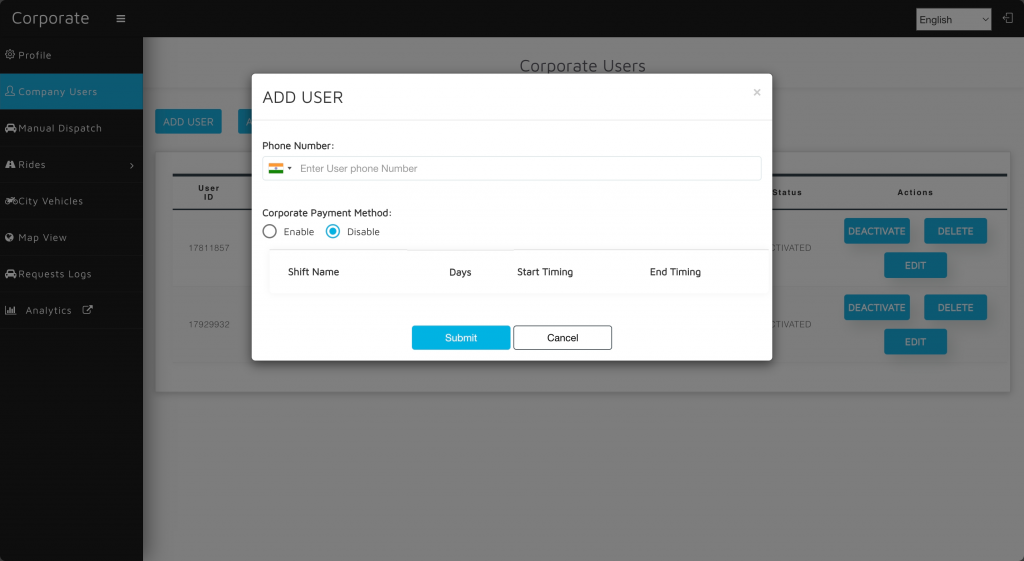
A User can be associated with multiple corporates at a time
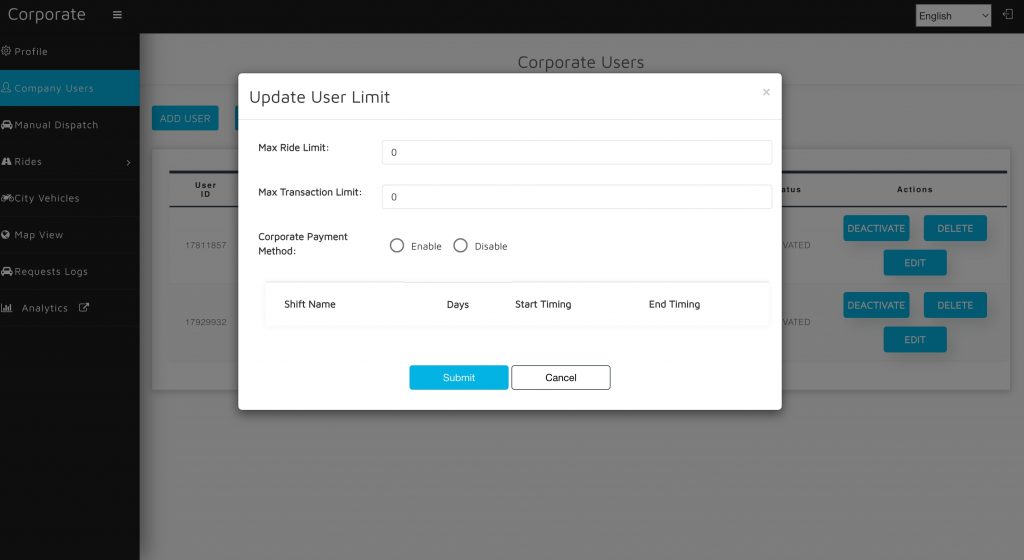
Max Ride Limit : No of rides that customers can take.
Deactivate: Corporate Admin can deactivate the user.
Max Transaction Limit: Maximum amount user can use in rides.
c. Manual Dispatch
Corporate dashboard lets a Corporate User to request rides for its specific Users from the Admin Dashboard. A ride can either be scheduled or on demand based upon the requirement.
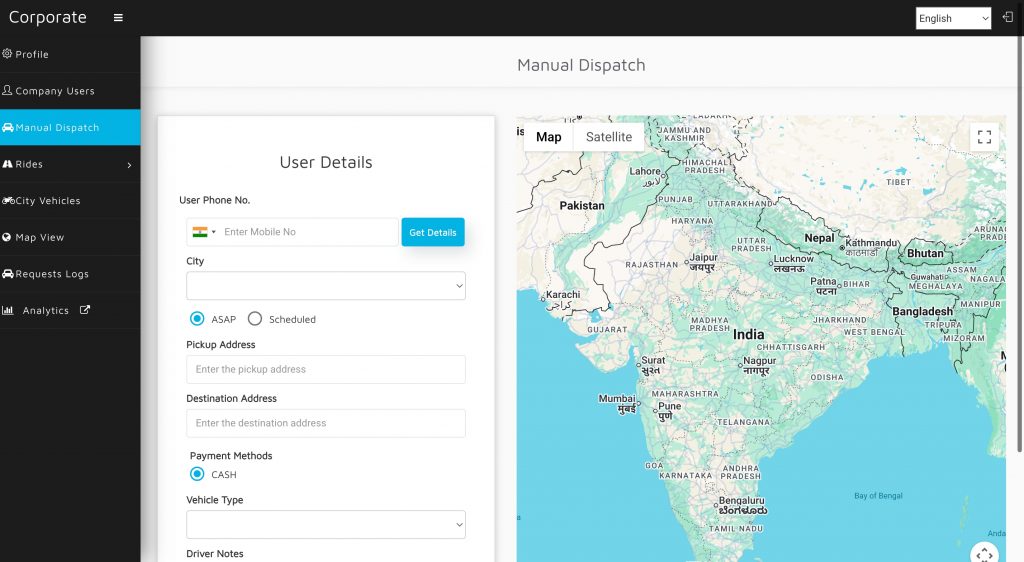
Figure 3.2: Manual Dispatch
It works similar to how the Manual Dispatch in Taxi Admin works but the difference is that the Corporate cannot request a ride for a User that is not added under its Corporate.
d . City Vehicles
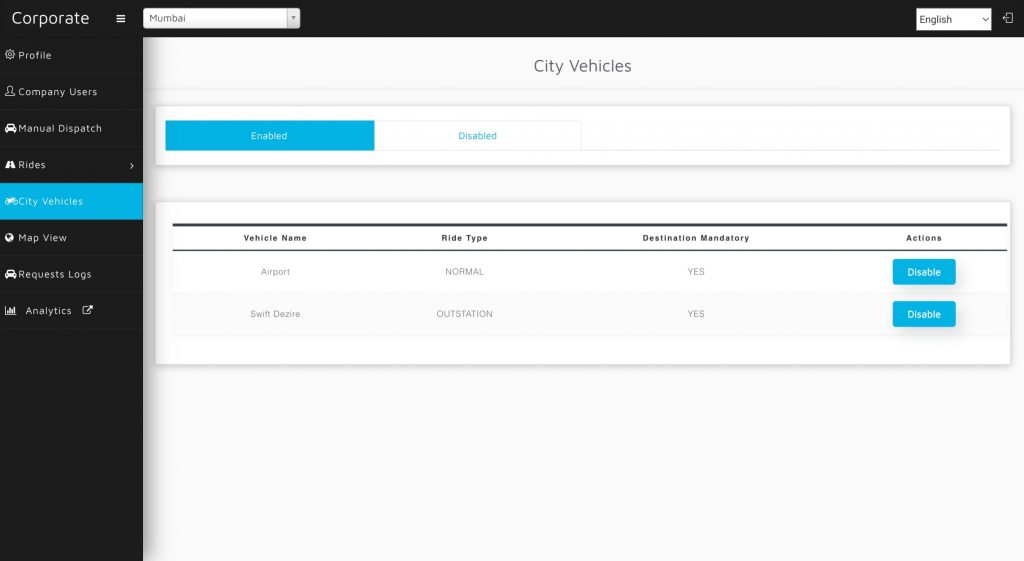
Here Corporate Admin can enable and disable the Ride type
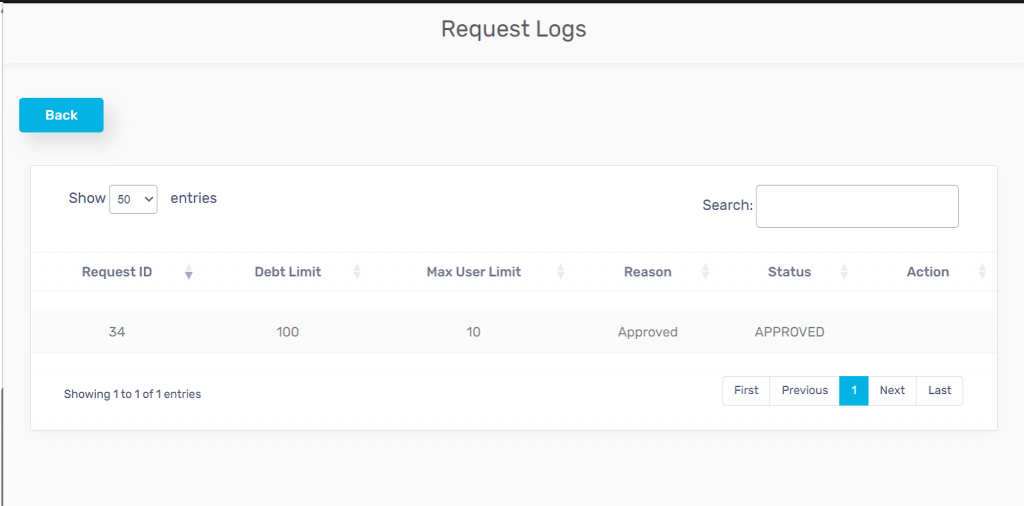
e. Request Logs
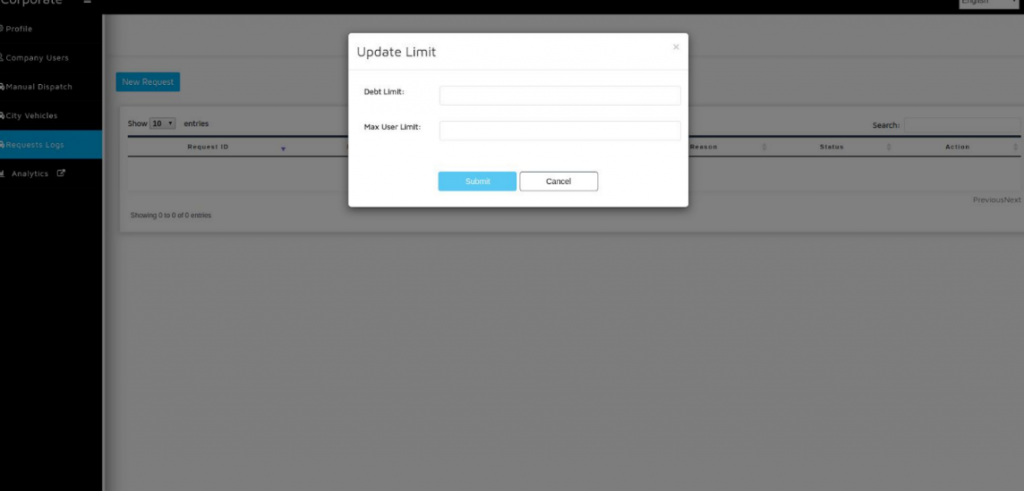
Figure 3.4 : Request Logs
Debt Limit : Admin can set the debt limit for the user.
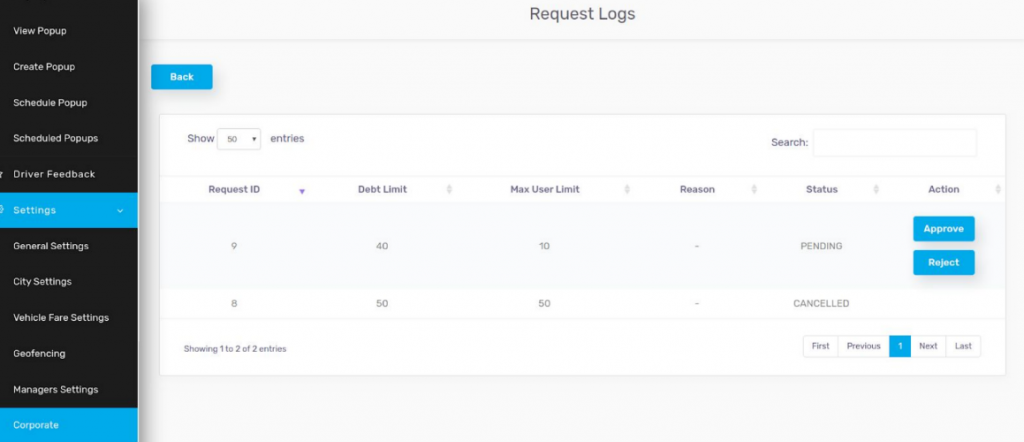
Max User Limit: Admin can set the max user limit . The no of users, that the corporate can add.
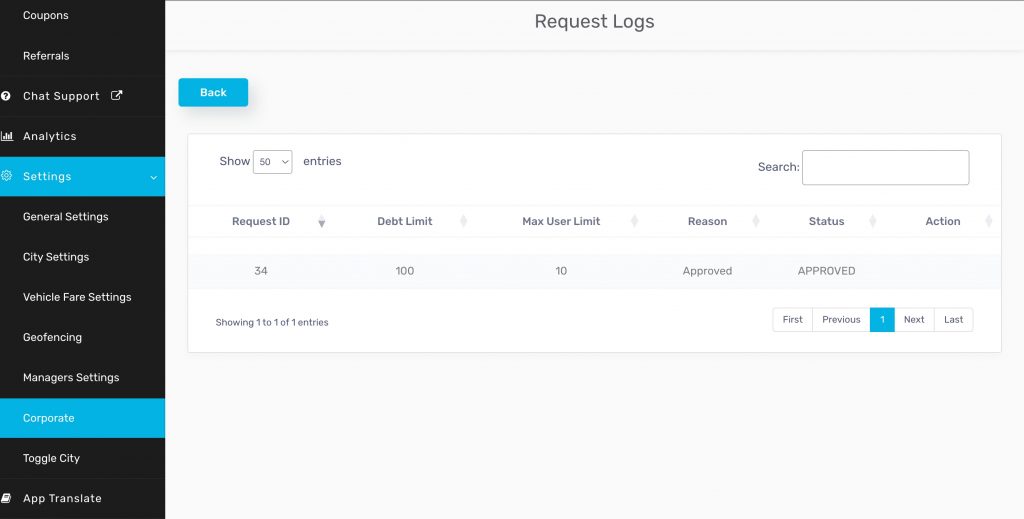
Once the debt limit and max use limit are added then the status will go to the pending state. Then super admin can approve the status.
f. Corporate Analytics
It allows the Corporate the check the Ride Details, User Details and Ride count on a regular basis so that they are aware of the usage stats.
4. Application Side Flow
To use the corporate benefits, users need to follow these steps:
- Download the App: The user must first download the app on their phone.
- Login to the App: The user logs into the app using the phone number registered under the corporate account.
- Select Payment Method: After entering the pick-up and drop-off locations, the user will be able to see the “Corporate” payment option. This option is only visible to users added to the corporate account. They can select this option to book the ride.
(Refer to the image below for how the payment option will appear in the app.)
- Ride Confirmation: Once the corporate payment option is selected, the ride will be booked without any charges, as the user is part of the corporate account.
This ensures users can easily access and book rides under the corporate plan without incurring any charges.
Leave A Comment?