
The “App Translations” section allows you to manage the languages within your platform. Here’s a breakdown of the functionality:

1. Server Type
- Under Service type you always need to Choose the “Autos” option from the dropdown menu.
2. Device Type
- Choose the type of device for which you want to manage translations. For example, “ANDROID” is selected here, meaning the translation updates will apply to the Android version of the app.
3. App Type
- Choose the type of app to which the translations will apply. The options might include different user interfaces such as “CUSTOMER” (selected in the screenshot) or others like “DRIVER” or “ADMIN”.
4. Select Locale
- Choose the locale (language and region) for which you want to manage translations. “English” is selected in the screenshot, meaning the translations shown or modified will be English in this case.
5. Translation Type
- Choose the type of content you wish to translate. In the screenshot, “APPS” is selected, indicating that the translations will apply to the app’s interface.
6. Search Value
- Input: This field allows you to search for specific translation keys or text values within the selected locale and translation type. This is useful for finding specific terms or phrases that need updating.
7. Update Language File
- After making changes to the translation settings, click this button to update the language file. This will apply your changes and update the app’s interface accordingly
Add Locale
The “Add Locale” section is used to add a new language or regional variant (locale) to your application. This feature is particularly useful when expanding your app’s accessibility to users in different languages. Below is an explanation of the key components and functionality of this section:
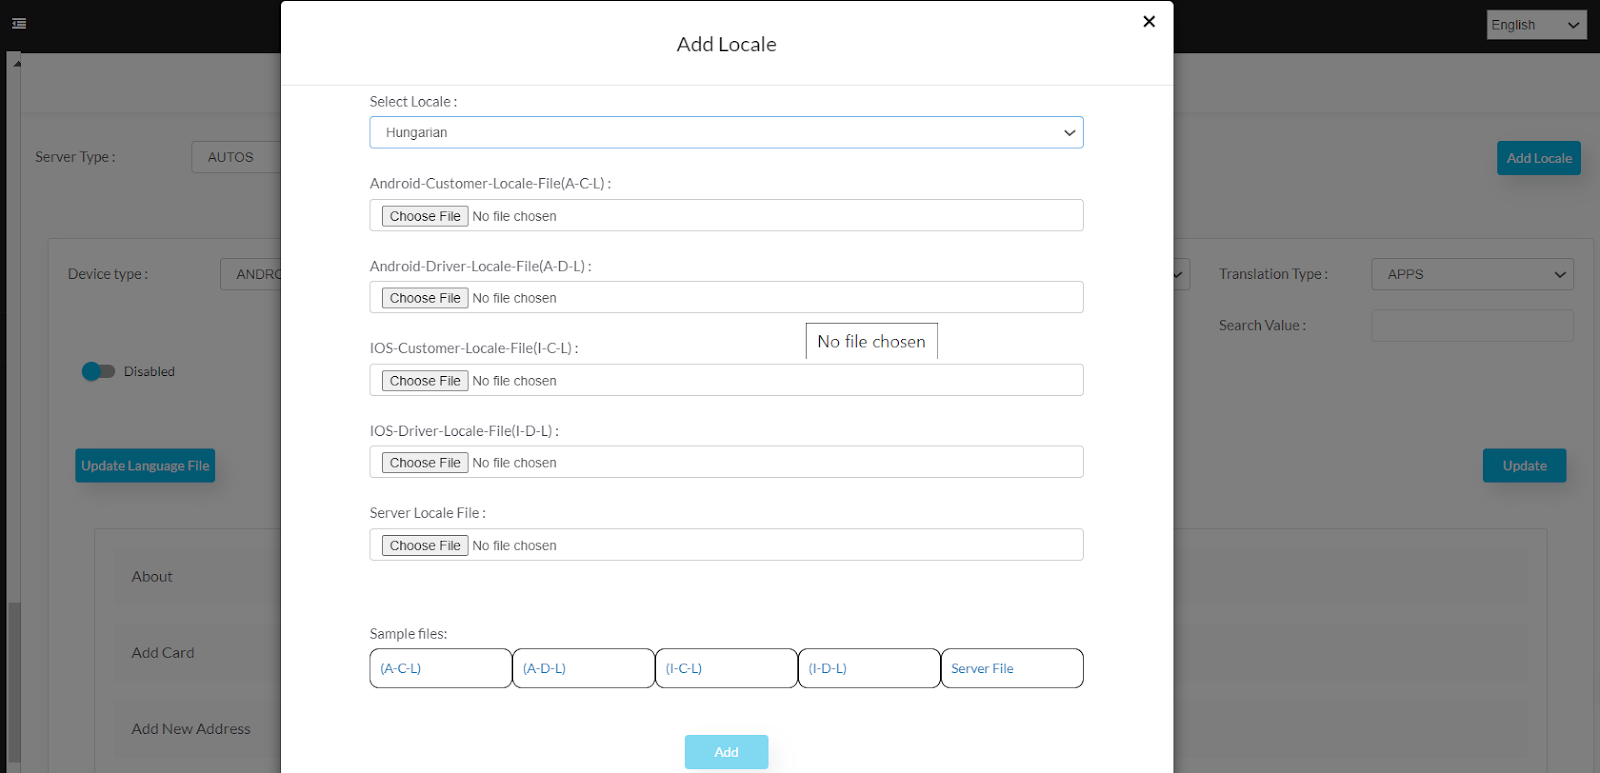
1. Select Locale
- Dropdown Menu: Select the locale (language and region) you want to add. For example, “Hungarian” is selected in the screenshot. This selection determines the language settings that will be applied to the app.
2. Android-Customer-Locale-File (A-C-L)
- You can upload the locale file specific to the Android Customer app here. This file contains the translated text that will be used in the Android version of the customer app.
3. Android-Driver-Locale-File (A-D-L)
- Similar to the customer locale file, this field allows you to upload the translation file specific to the Android Driver app.
4. IOS-Customer-Locale-File (I-C-L)
- Upload the locale file for the iOS Customer app here. This file ensures that the iOS version of the customer app displays text in the selected language.
5. IOS-Driver-Locale-File (I-D-L)
- This field allows you to upload the translation file for the iOS Driver app, ensuring that it also supports the selected locale.
6. Server Locale File
- The server locale file is uploaded here. This file is essential as it may contain translations that apply to server-side (Admin panel).
7. Sample Files
- Download Links: These links (e.g., A-C-L, A-D-L, I-C-L, I-D-L) provide sample locale files that you can download. These samples can serve as templates to help you format your translation files correctly before uploading.
8. Add Button
- Action: Once all the required files are uploaded and the locale is selected, clicking the “Add” button will integrate the new locale into the system. This will make the app available in the newly added language.
Updating Locale File in App Translations
The “Update Locale File” section is used to update an existing language or regional variant (locale) within the application. This feature is crucial when you need to make modifications to the translations currently being used in your app. Below is a detailed explanation of the components and functionality:
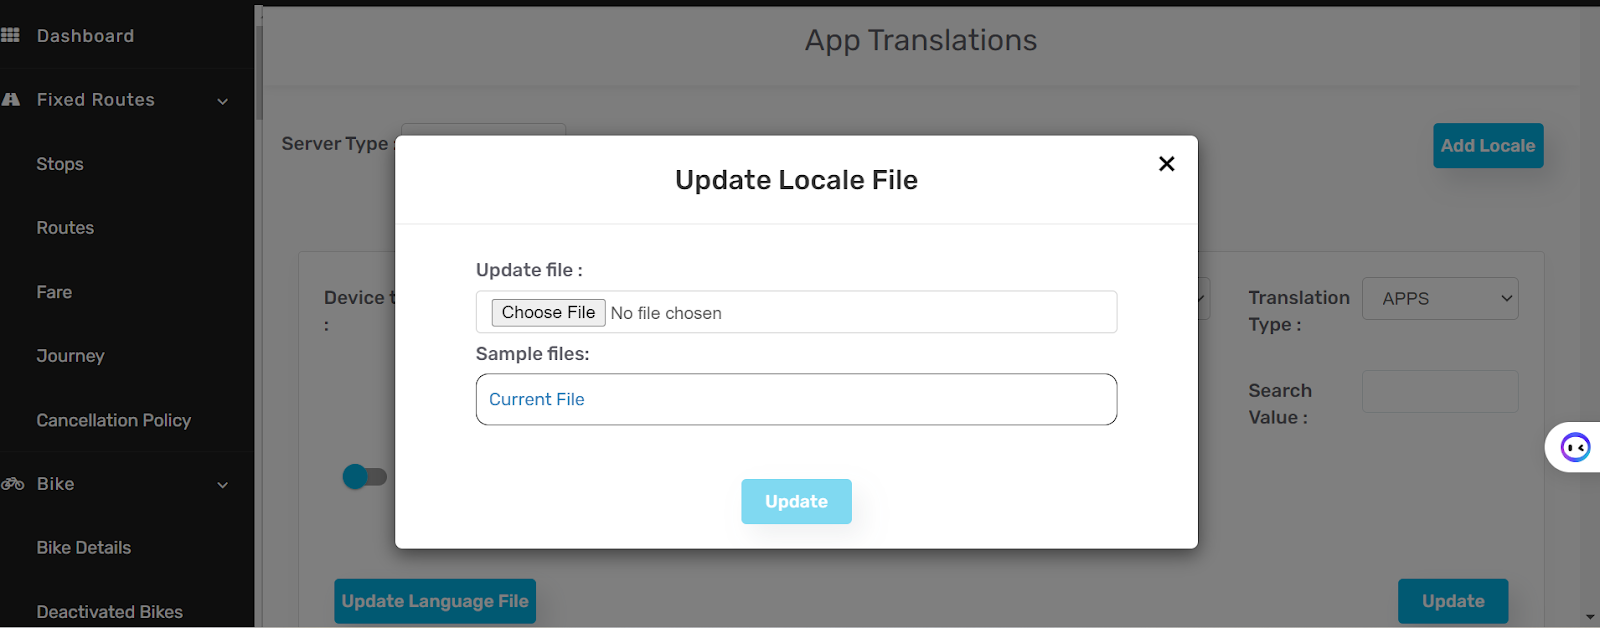
1. Update File
- You can upload the updated locale file by clicking on the “Choose File” button.
- The file you upload here will replace the existing translations with the updated text. This is useful when corrections, improvements, or additions to the translations are required.
2. Sample Files
- The “Current File” link allows you to download the existing locale file currently in use.
- This provides you with a reference to the current translations, enabling you to make necessary updates. It can serve as a template to ensure that the new file has the correct structure and content.
3. Update Button
After uploading the new locale file, clicking the “Update” button will apply the changes across the app. This will ensure that all text within the app reflects the updated translations.
Leave A Comment?