
To create a new Merchant account, click on the Add New Merchant button.
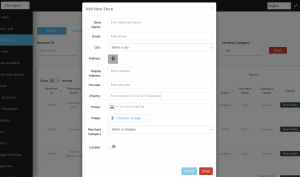
Upon entering the necessary details, click on the Submit button to create a new Store/Merchant in the system.
To view further details and make changes to a Merchant account, go back to the Merchant List page and click on the View Details icon in the selected merchant row.
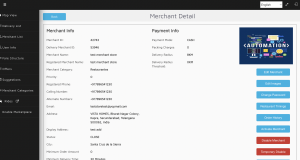
To modify the Merchant details, click on the Edit Merchant button.
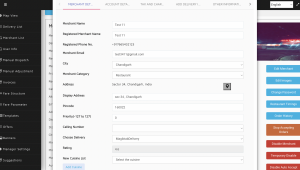
Upon entering the necessary details in the Merchant Details, Account Details, Tax and Charges & Add Delivery Info sections, click on the Save option to modify the Merchant Details.
To modify the Restaurant Timings, click on the Restaurant Timings button in Merchant Details page.

- To modify the timings, click on the Edit button and enter the Start and End Times. Exceptions to this timing can be added from the Category and Items option.
- To create a new slot, click on the Add New Slot
- To repeat the timings on another day, select from the Repeat On
- Save the settings.
Go back to Merchant Details page.
The Order History button redirects to the Delivery List option in the SideBar.
To halt the acceptance of Delivery orders for a time period, click on the Stop Accepting Orders toggle option and enter the remarks.
To start the acceptance of Delivery Orders, click on the Activate Merchant toggle option and enter the remarks.
To temporarily disable a Merchant account for some days, click on the Temporary Disable option and enter the Date for which the Merchant is to be disabled along with the remarks.
To overwrite a temporarily disabled account, click on the Re-Activate option.
To disable a Merchant account for an indefinite time, click on the Disable Merchant option.
To activate an indefinitely suspended merchant account, click on the Activate Merchant option.
To view the OTP which the merchant receives while logging in, click on the View OTP option.
To access and modify the list of Available items, scroll down in the Merchant Details page.
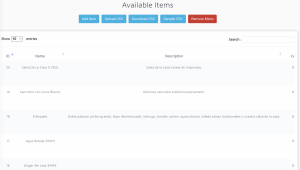
Note: Do not remove any column headers from the Sample CSV or Downloaded CSV. All columns should be present even if they are not filled.
To create a new item, click on the Add Item button.
Items can also be added by uploading a CSV file with the item details by clicking on Upload CSV.
To download a sample CSV, click on the Sample CSV option.
To view the list of all current items in Excel, click on the Download CSV option.

Upon entering the necessary details, click on the Create Item option to add a new item.
- To modify an existing item, click on the Edit Item
- To modify the Item availability status, toggle the Enable/Disable option.
Leave A Comment?