
1. What is Shuttle?
Shuttle service is basically a method of transporting a large group of people (typically more than 5) from one place to another in one ride. Usually, shuttle services have designated drop-off and pick-up points, and shuttle vehicles operate between the defined stops at regular stops (ON this platform, Based on the stops defined by the admin)
Shuttle service is a general service offered wherever there are large groups of people going to the same place.
2. Admin Panel
An admin panel is a system that enables administrators to conduct various functions such as monitoring, maintaining, and controlling services for users as well as drivers.
STEP 1 – The First step would be to add stops and fares. Define the route and the cost you wish to charge per person on the route based on the stops you wish to put on that route.
There’s a section on the admin panel with the name STOP Under the “Fixed routes” tab where we can configure the below things.
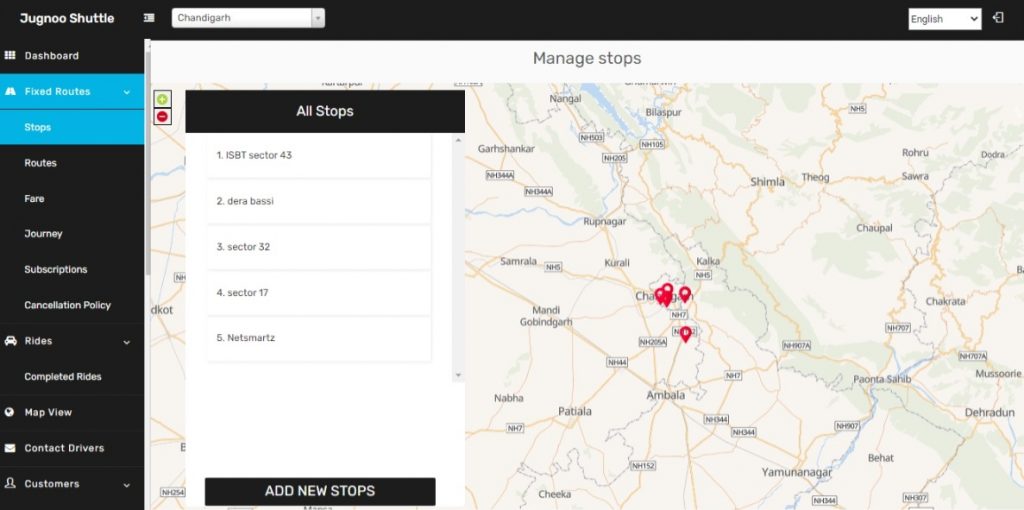
Figure 2.1: (Add Stops)
- From the side menu, go to the Routes tab.
- Enter the stop’s name.
- Enter the stop’s address
- Add the request radius, this is the distance up to which the stop would be considered.
- Use the map interface on the right to define the stop.
- Add stop.
STEP 2 – Adding Fares
Fare refers to the money that Users/Customers pay for traveling on a vehicle ( In this case it would a Shuttle). We have a complete section of fare on the dashboard where the admin can setup the different prices for shuttle services accordingly
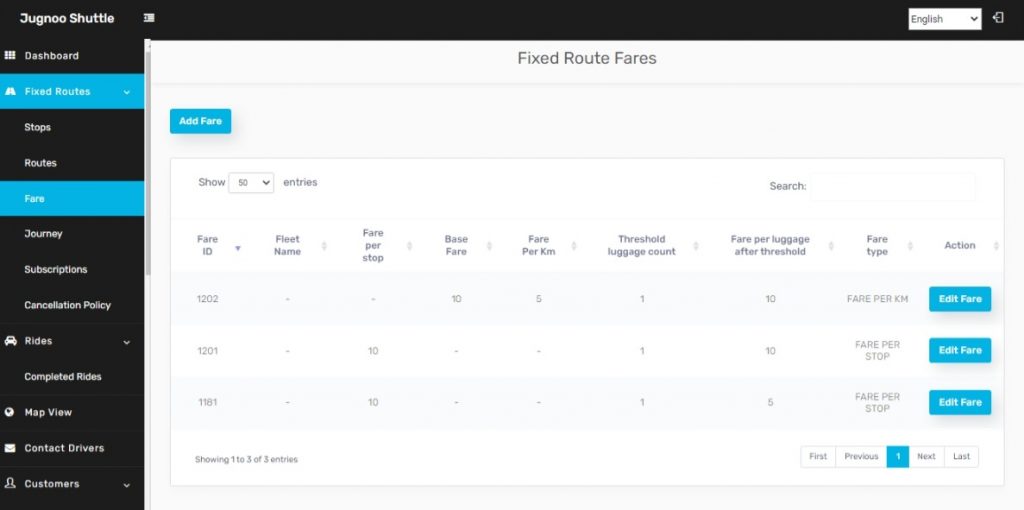
Figure 2.2: (Add Stops)
- From the side menu of the admin dashboard, click on Fares.
- Click on the Add fare button.
- A dialogue box opens up, choose the Fare Type (depends on if you are defining it for customer or Driver), Fare Per Stop (For now, we are offering a payment logic where a route X will have a fixed fare per stop defined by the Admin from the panel, let’s say ‘Y/ stop, so the fare would total up to no. of stops traveled by user * Y’).
- Threshold luggage count would be the no. of bags per user admin would want to allow for free, anything above that would be chargeable and the charges will be defined in the fare per luggage after the threshold. Add fare.
STEP 3 – Create a route
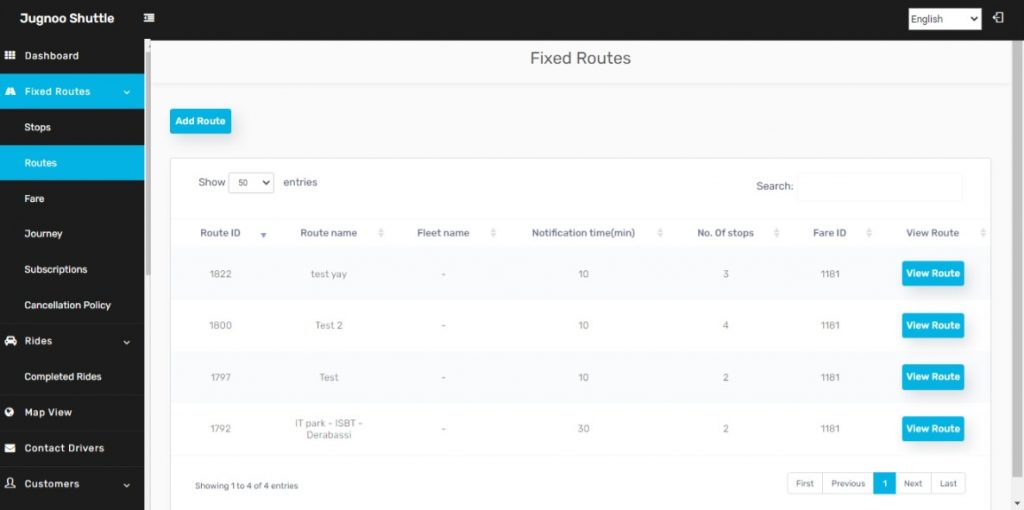
Figure 2.3: (Create a Route)
- From the side menu, go to the Routes tab.
- Click on Add route button.
- The next screen will allow the admin to name the route, add the stops for this route, also define the approximate amount of time it will take for the designated driver to reach from stop 1 to stop 2 and so forth, and select the fare ID he/she wants to associate with this particular route.
- This screen will also have a map interface on the right with red pins denoting the pre-defined stops, which can now be added to the route.
- Once all the above are added, Create route allows the Admin to view the route with the stops as follows:
STEP 4 – Creating a Journey
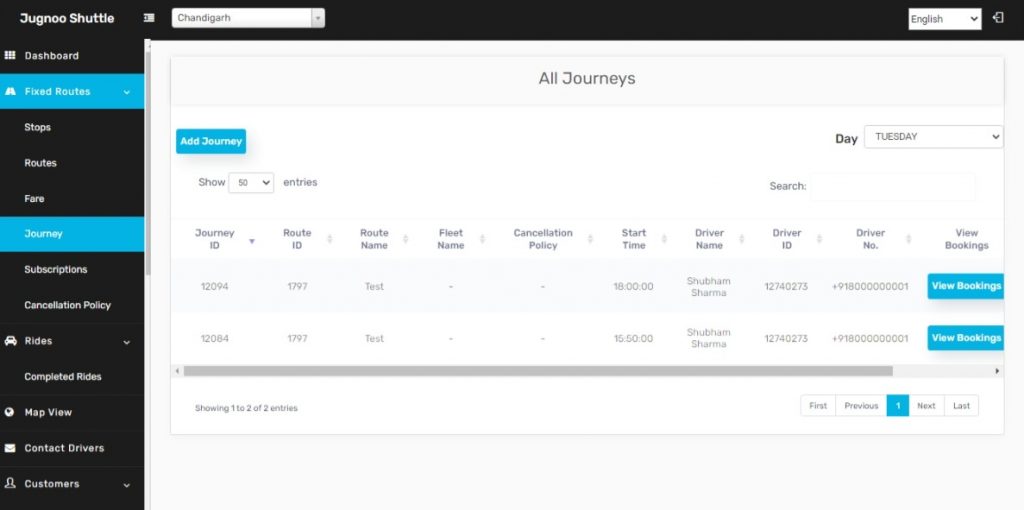
Figure 2.4: ( Creating a Journey )
- From the side menu, choose the tab Journey.
- Click on Add Journey button.
- The dialogue box allows the admin to define all the necessary elements to create a Journey.
- Select the route from the drop-down of all the created routes.
- Define the start time for this journey.
- Select the vehicle type (Shuttle)
- Assign the driver for this journey. ( While creating a Journey, admin can also skip this part and assign the driver afterward )
NOTE – In the case of a journey created without a driver, a ride request will be sent to all of the available drivers prior 5 minutes before the starting time of the Journey. A popup will appear in the driver app, the driver can accept or reject the journey. - Select the days from the 7 days of the week for this journey to happen.
NOTE: Once you create a Journey, can view the bookings made against and edit any of the details for this Journey.
STEP 5 – Seat Structure
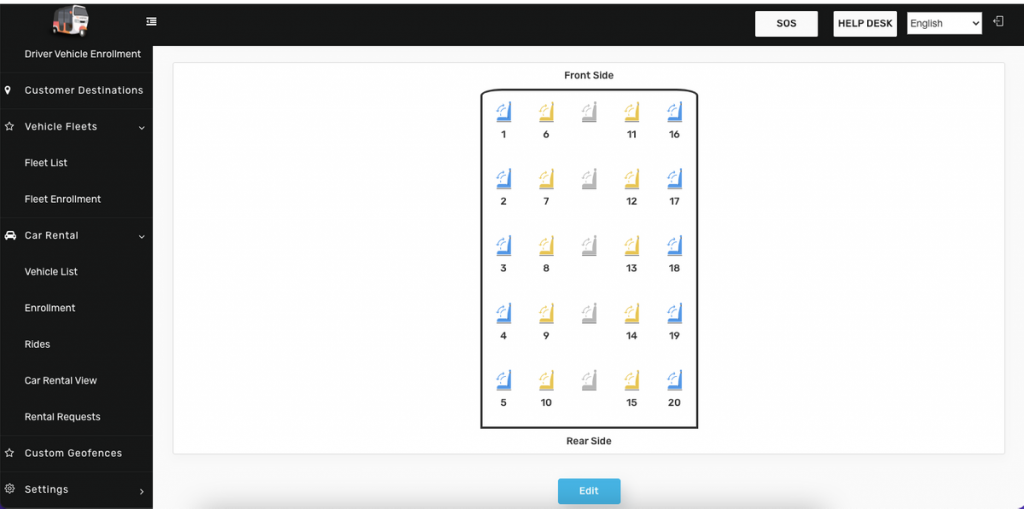
Figure 2.5: (Seat Structure)
The admin can also check the seats which have been occupied by the customer through the customer application. Admin has the ability to Add or Edit the structure accordingly
STEP 6 – Completed Rides
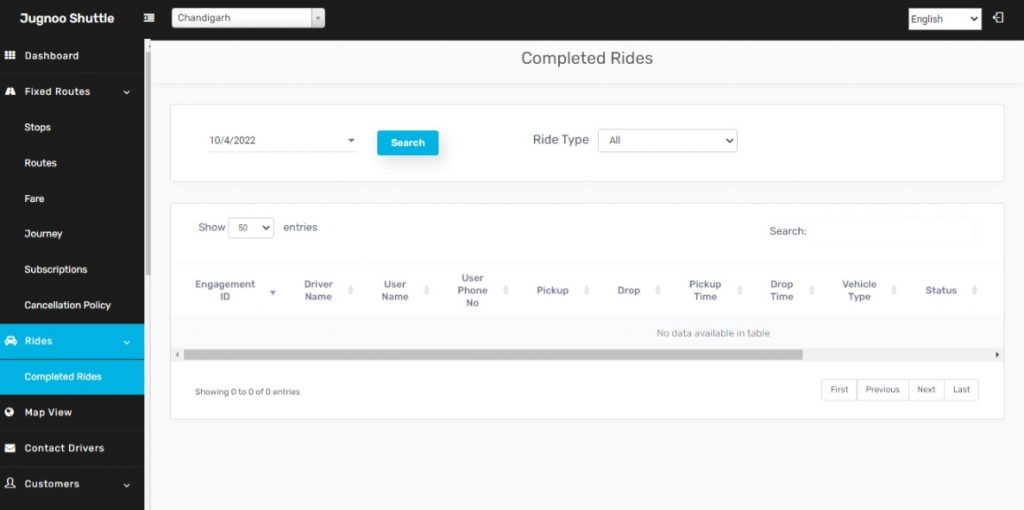
Figure 2.6: ( Completed Rides )
Once the Ride has been completed, the admin will be able to view all the completed rides with the help of the Date & ride type filter. Admin will be able to see all the data related to the ride Starting from the Pickup time to drop time.
3. Customer Flow
- In the first phase, the User needs to open the customer app to request a ride on the Shuttle platform. Users would be able to see their current location on the map on the Homepage, however, they will also have the ability to add Pickup as well as Drop Location to request a Ride.
![]()
( Figure 3.1 )
- After adding the pickup and drop locations, the user will be able to view all the routes available in the requested path. The fare price, duration, and timing of the shuttle service are also shown on this page
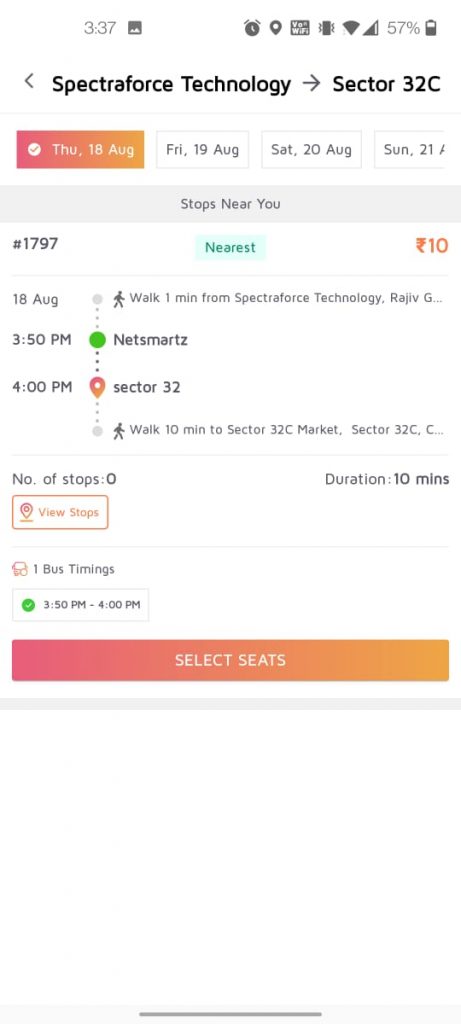 ( Figure 3.2 )
- On this page, Users can also check the stops included in this specific journey by clicking on the “View Stops” button On this page which will redirect them to the “STOPS DETAILS” page.
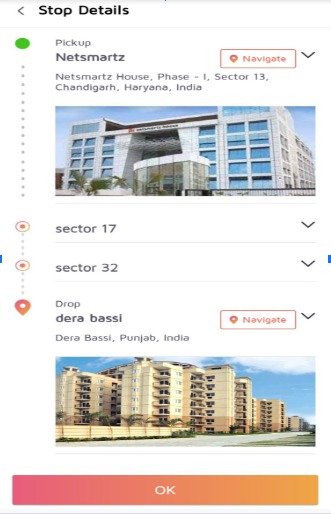
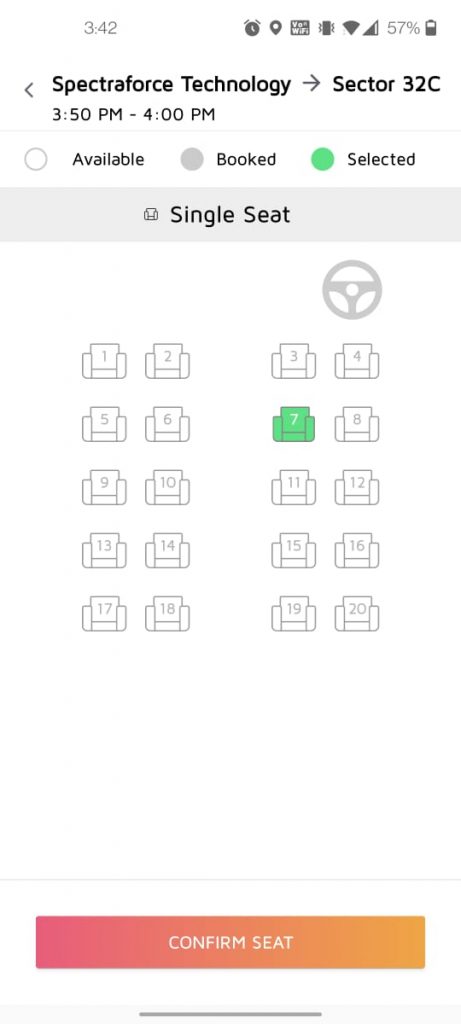
( Figure 3.3 ) - In the Fourth Stage, users would be able to select the seats of the requested vehicle. It can also be Modified after the booking as well which means the user would be able to shift the seat number with any other available seats.
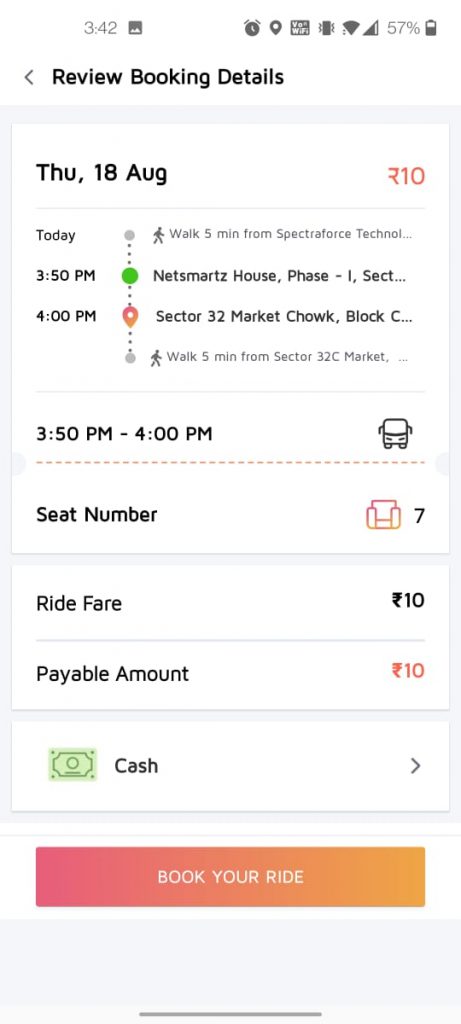
( Figure 3.4 ) - After the selection of seats, a screen will appear which will show the summary of the booking.
( Figure 3.5 )
- Once the Booking has been made, the user will be able to see the Journey ID, Journey Date, Number of
tickets & Total Amount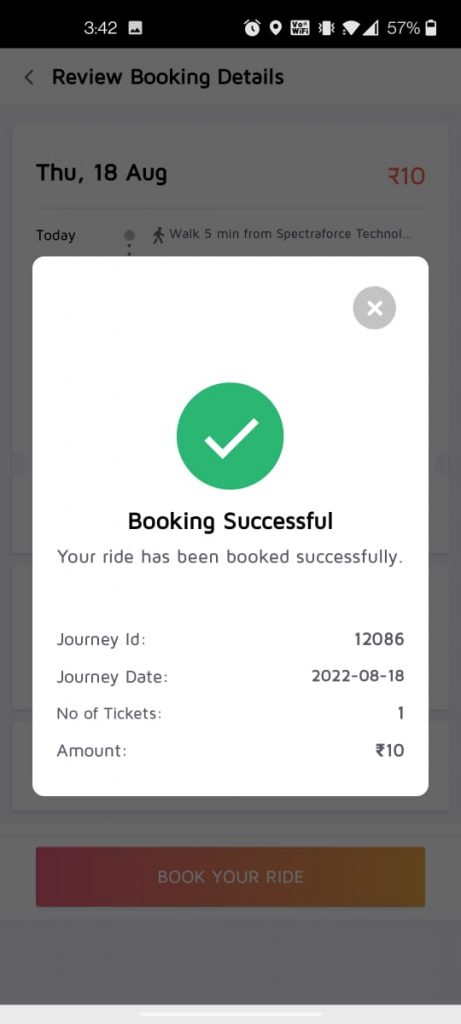
( Figure 3.6 )
- Users can check the rides that they had made in the App by clicking on the “My Rides” Option in the app. The “Past Rides” option will show the Rides with their details which have been taken by the user in the Past.
![]()
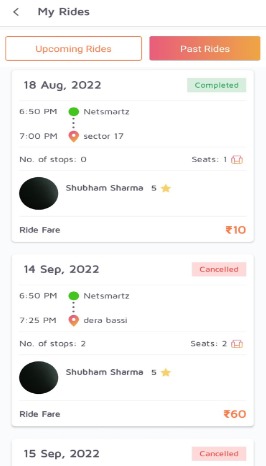
( Figure 3.7a ) ( Figure 3.7b )
- Users can also review the seat structure booked for their journey by clicking on the “View Details” button.
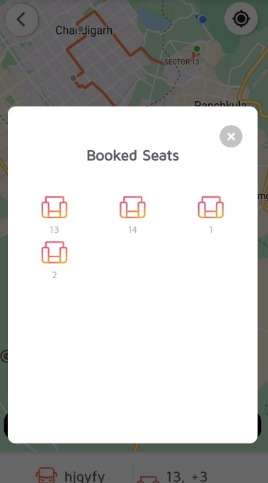
( Figure 3.8a ) ( Figure 3.8b )
- As mentioned above, Users will also be able to modify the seat or they can also cancel the Booking depending on the cancellation policy that the admin has made on the platform by clicking on the
“Modify Ride” Button.
( Figure 3.9 )
- In the Below Screenshot, we have shown the Customer Journey once the ride has been started in the
customer app.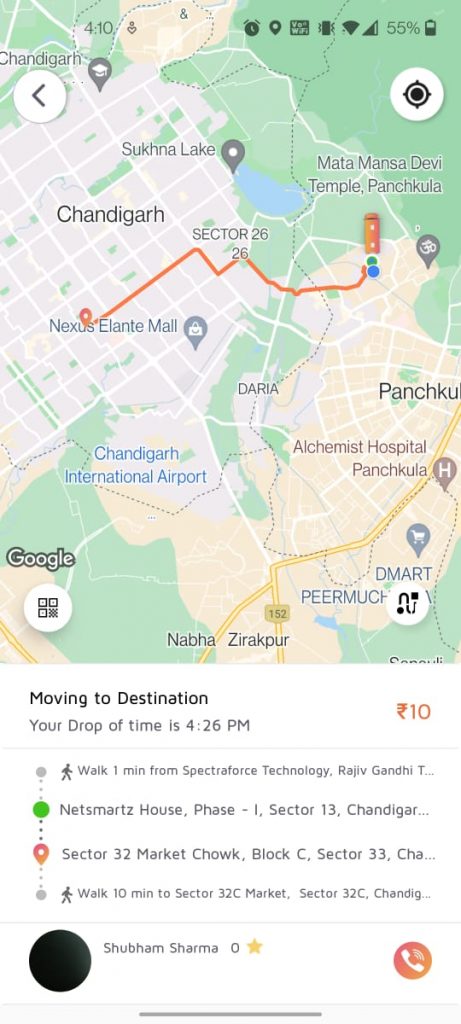
( Figure 3.10 )
- Customer Onboarding – When the vehicle will reach the Designated stop, the user has to show a QR
code or OTP to the driver for confirmation.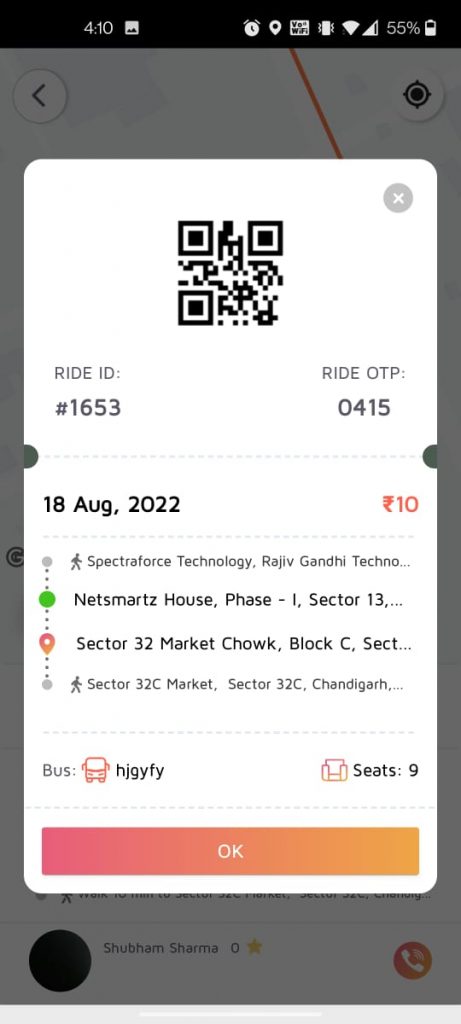
( Figure 3.11 )
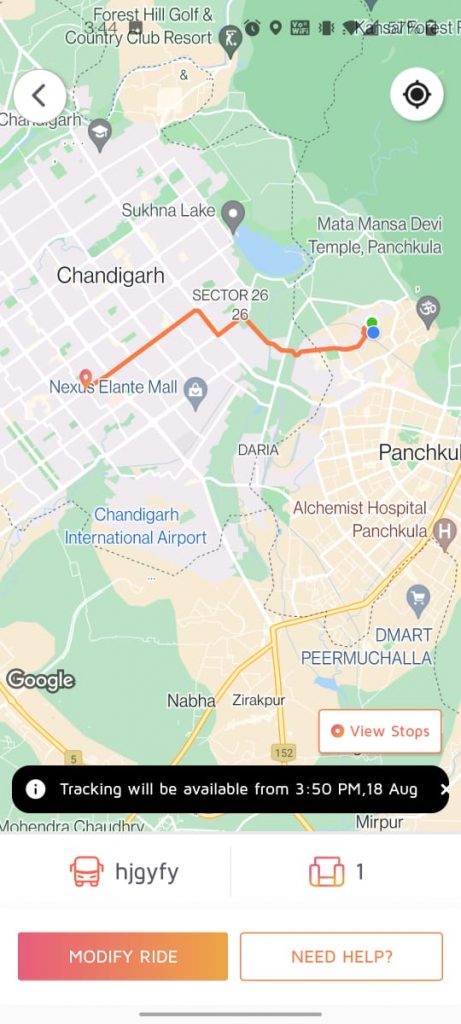
- Once the ride is started, there will be an option on the customer app, i.e. “Track Ride” which will help
the users to track the current location of the shuttle.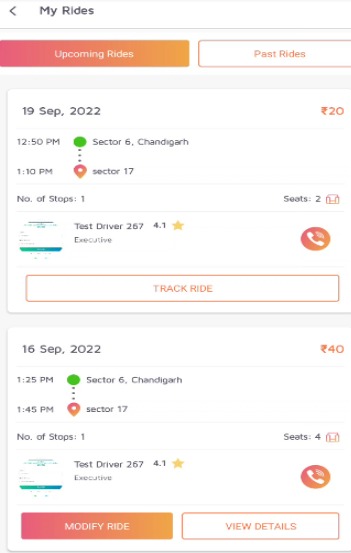
( Figure 3.12 )
- After the ride is completed, there will be a popup where the customer can give the driver feedback. In
addition, they will also be able to give journey ratings.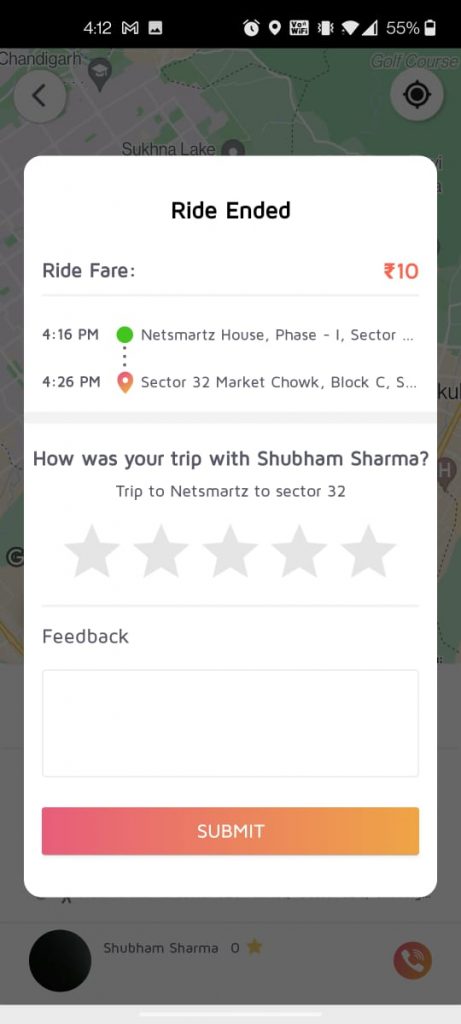
( Figure 3.13 )
4. Driver Flow
- In the first phase the driver needs to open the application and change his status to online, the Driver would be able to see his / her current location on the maps, and he can see his rides on routes on the
side panel.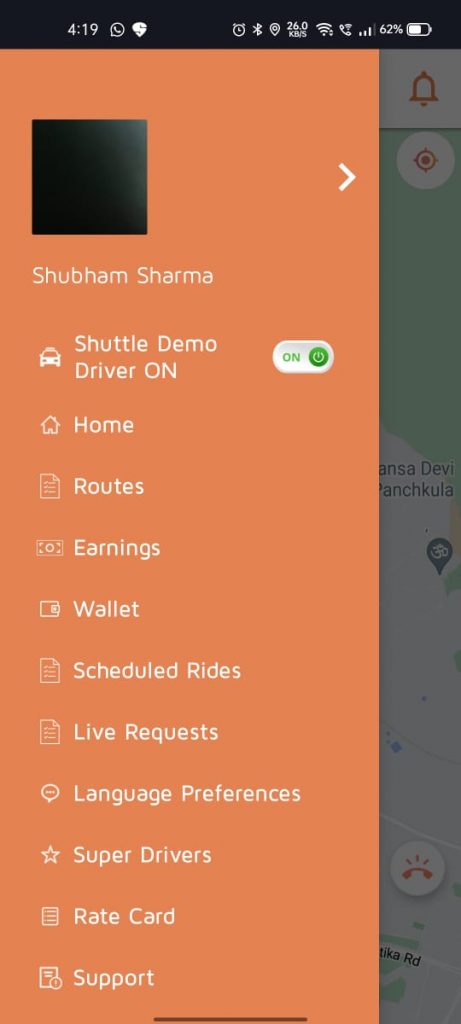
( Figure 4.1 ) - Click on the Routes to see the available or assigned route
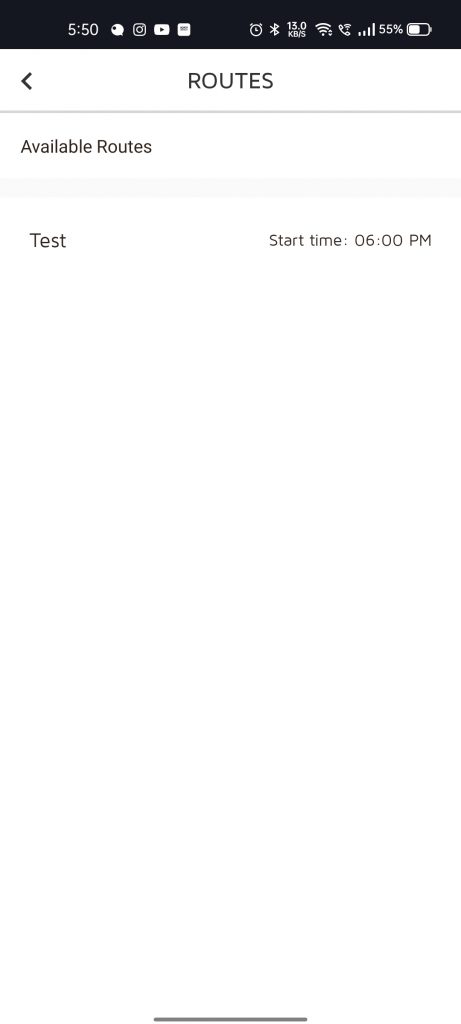
( Figure 4.2 )
- After clicking it will redirect to the main screen where the driver would be having the option START the ride and other details related to the trip such as price, distance, etc.
( Figure 4.3)
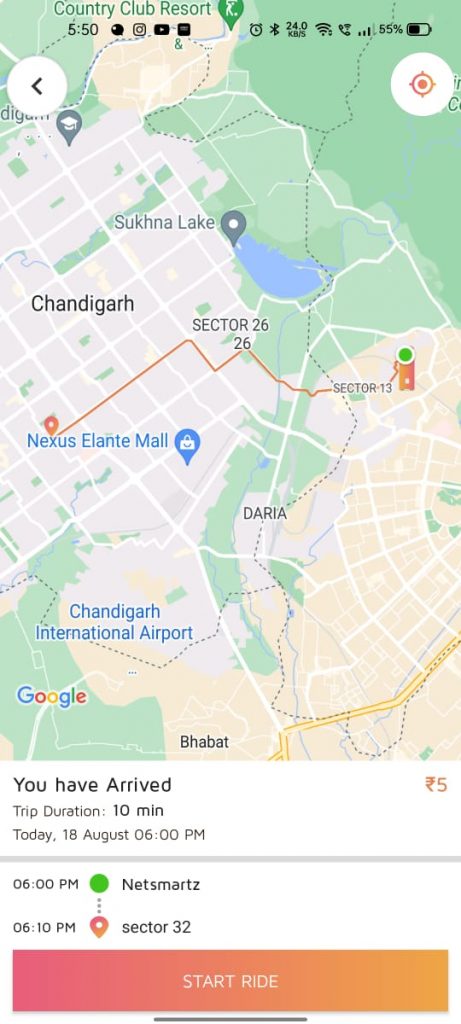
- When you start the ride, the next option has arrived, where you arrive at the starting point.
( Figure 4.4 )
- Once you reach the stop you will have the option to start onboarding and then you will have a list of people who will be onboard, you can enter the OTP or scan the QR code to start onboarding.
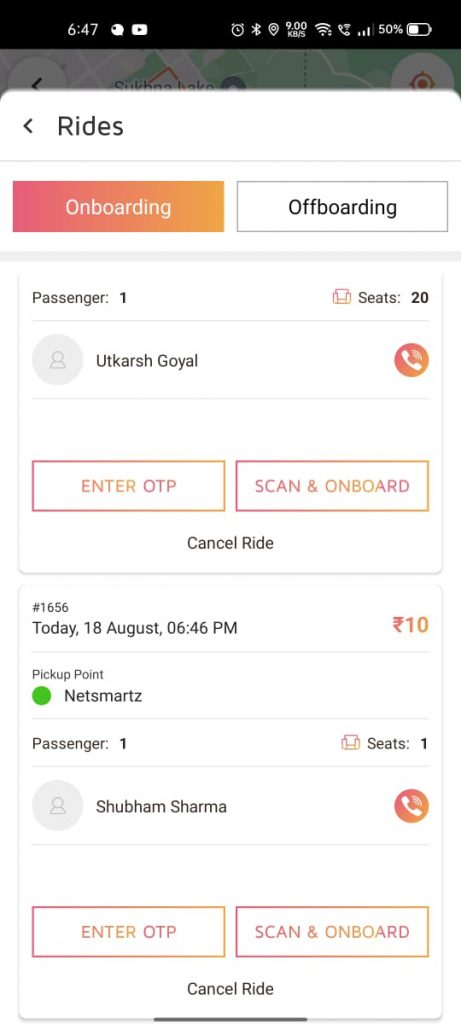
( Figure 4.5 )
- On the driver’s app, we have integrated a new functionality at the time of onboarding riders (customers), i.e. “Few riders are left to pick /drop” if there is a rider left at the pickup location.
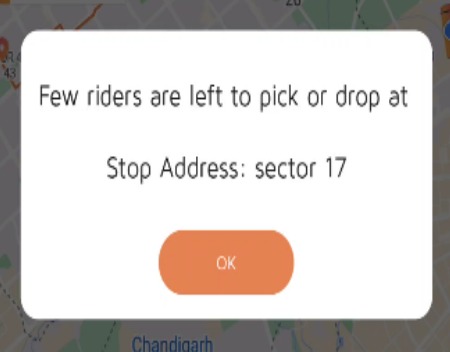
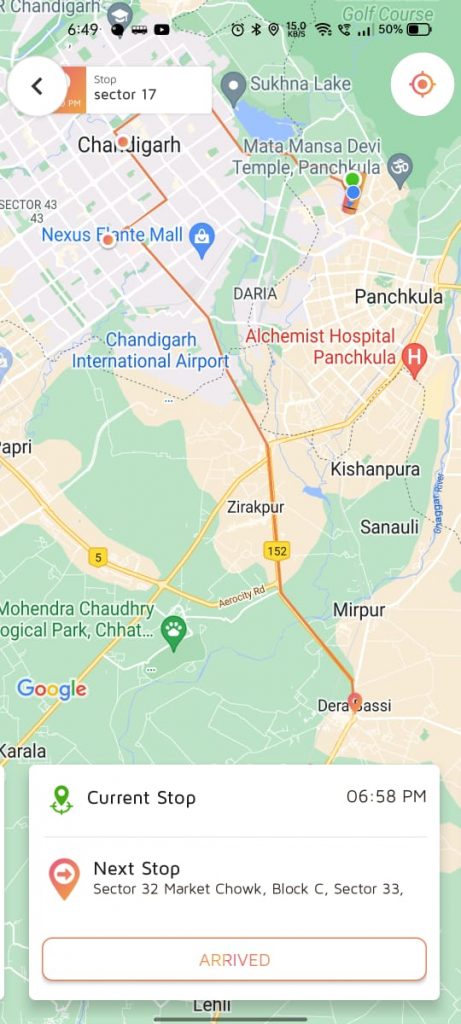
( Figure 4.6 ) - When we’ll arrive at the next stop again onboarding will go on and simultaneously offboarding would also take place, we have to select the user and offboard him
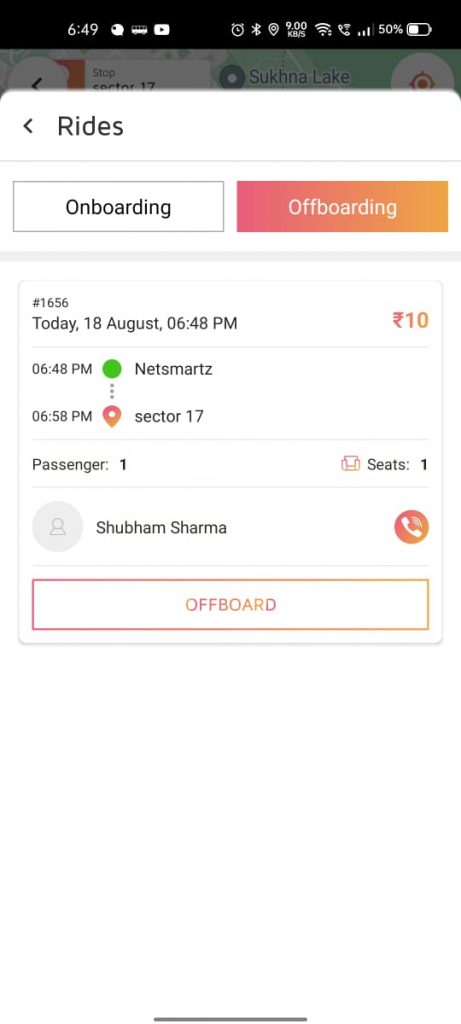
( Figure 4.7 )
- After the offboarding, the driver would have an option to rate the customer and provide any feedback
regarding the customer.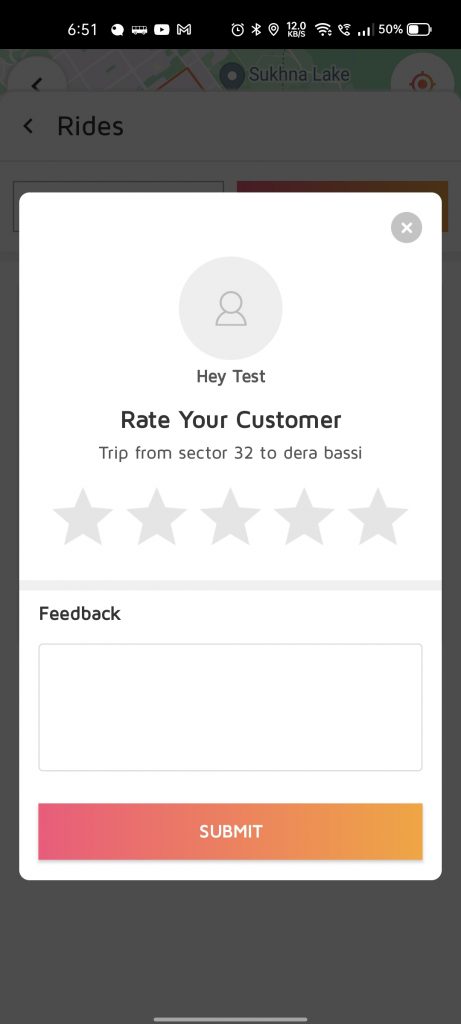
( Figure 4.8) - Once the Ride has been completed, Driver can also see the Ride history as well as Customer details who had been included in this specific Journey.
Go to Driver app > Earnings > Ride history > Click on any Ride to fetch the data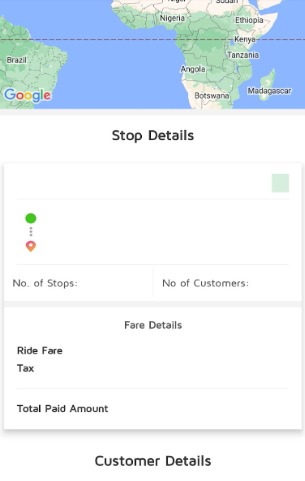
( Figure 4.9 )
Leave A Comment?